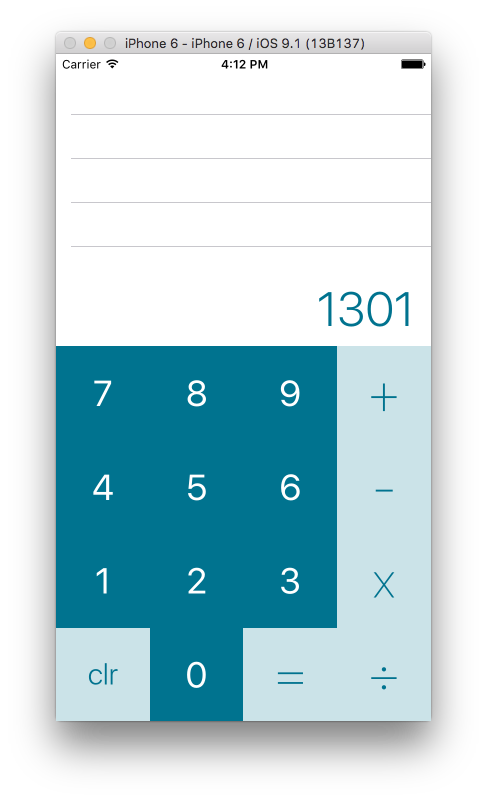
In Parts 9 and 10, you did the leg work on adding a UITableView to your Storyboard. If we try it in the simulator, though, it doesn’t actually do anything yet. (You may or may not see the lines, depending on the scaled resolution of your simulator.)
We need to add the code that controls the Table View itself. UITableView has two delegate-type classes: UITableViewDelegate and UITableViewDataSource. The Delegate controls aspects like row height and user interaction, while the Data Source actually provides the Table View with data. We only need to implement the Data Source.
Turning our View Controller into a Data Source
UITableViewDataSource is a protocol that can be conformed to by any class. Because of the way our project is set up so far, it makes perfect sense to make our ViewController class simply conform to the protocol instead of creating an entire new class.
class ViewController: UIViewController, UITableViewDataSource {
Now you’ll get some errors if you try and build your project. And that’s totally expected. UITableViewDataSource requires that we implement two specific functions before the class can be considered to conform to the protocol: tableView(_:numberOfRowsInSection:) and tableView(_:cellForRowAt:).
numberOfRowsInSection tells the data source how many rows the table should have, and cellForRowAt creates a copy of the prototype cell that we made in Part 10.
numberOfRowsInSection:
We need to figure out how many rows are in our table. Speaking of, how are we actually deciding what goes in the table??
This is taken care of by the default CalculationDelegate that you’ve been using the whole time. The class has a previousExpressions array that holds the previous expressions entered by the user (as the name sorta implies). All we need to do is return the number of items in that array.
func tableView(_ tableView: UITableView, numberOfRowsInSection section: Int) -> Int {
    return calculations.previousExpressions.count
}
cellForRowAt:
This one is a bit more complicated. First I’ll show you the implementation so you can suck it all in, and then I’ll explain.
func tableView(_ tableView: UITableView, cellForRowAt indexPath: IndexPath) -> UITableViewCell {
    let index = indexPath.item
    let (expression, result) = calculations.previousExpressions[index]

    let cell = tableView.dequeueReusableCell(withIdentifier: "paperTapeCell") as! PaperTapeCell
    cell.customize(expression + " " + result)
    return cell
}
Line by line explanation, for the sake of knowledge
let index = indexPath.item
In UIKit, an IndexPath is a representation of both a Section and an Item within that section. In our table view, we’re only using one section, so indexPath.section will always be zero. We want the number of the item within that section, so we use indexPath.item.
let (expression, result) = calculations.previousExpressions[index]
calculations.previousExpression is an array of the type [(String, String)]. The parenthesis are part of what’s called a Tuple, allowing us to store multiple values in the same object. Each item of the array has the type (String, String). We pull out a value from the array (index) and then save the two values to expression and result.
let cell = tableView.dequeueReusableCell(withIdentifier: "paperTapeCell") as! PaperTapeCell
This is the part that actually creates out UITableViewCell. There are three major things happening here:
- We dequeue a cell with the identifier that we set in Interface Builder. If you followed what I did, that identifier is
paperTapeCell. - The
dequeueReusableCellfunction returns aUITableViewCell. - We know that this cell is a
PaperTapeCell, because we set the custom class of our prototype cell. We useas!to force-cast the cell to the correct class. It’s ok for us to do the forcibly (with an!), because we know it will never fail.
cell.customize(expression + " " + result)
Remember when we wrote the customize function inside of PaperTapeCell in Part 10? We did that so we could use it here. We call it here and let the cell itself handle the customization.
return cell
The culmination of all this work, we return our PaperTapeCell. From there, UIKit does its magic and throws it up on screen.
Connecting the Table View to the Data Source
As of now, our ViewController is a valid UITableViewDataSource, but we still haven’t told our Table View to use the View Controller as its data source. To do this, we need to make another connection in our Storyboard. Open up Main.storyboard again.
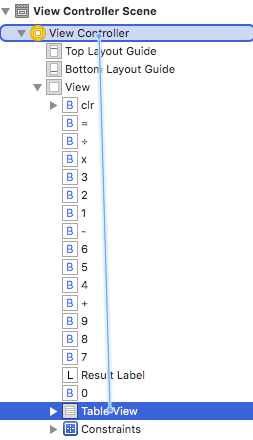
You’ll want to control-drag from the Table View to the View Controller. It’s probably easiest to do that in the View Hierarchy on the left.
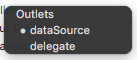
Then select dataSource, and you should be all set.
Testing in the Simulator
Fire up the simulator and see what happens. Type some expressions and see what the Table View does.
Drumroll……….. nothing. The Table View never updates.
What’s happening here?
We have the functions in place to configure the Table View, but these functions don’t just get called at random. We have to tell our Table View to reload its data. Specifically, we need to call tableView.reloadData().
Recap
We implemented UITableViewDataSource as a part of our ViewController and connected it to our Table View, but nothing happens on screen yet.
Next Time
We’ll make the table view reload when it needs to, and add in an animation.


