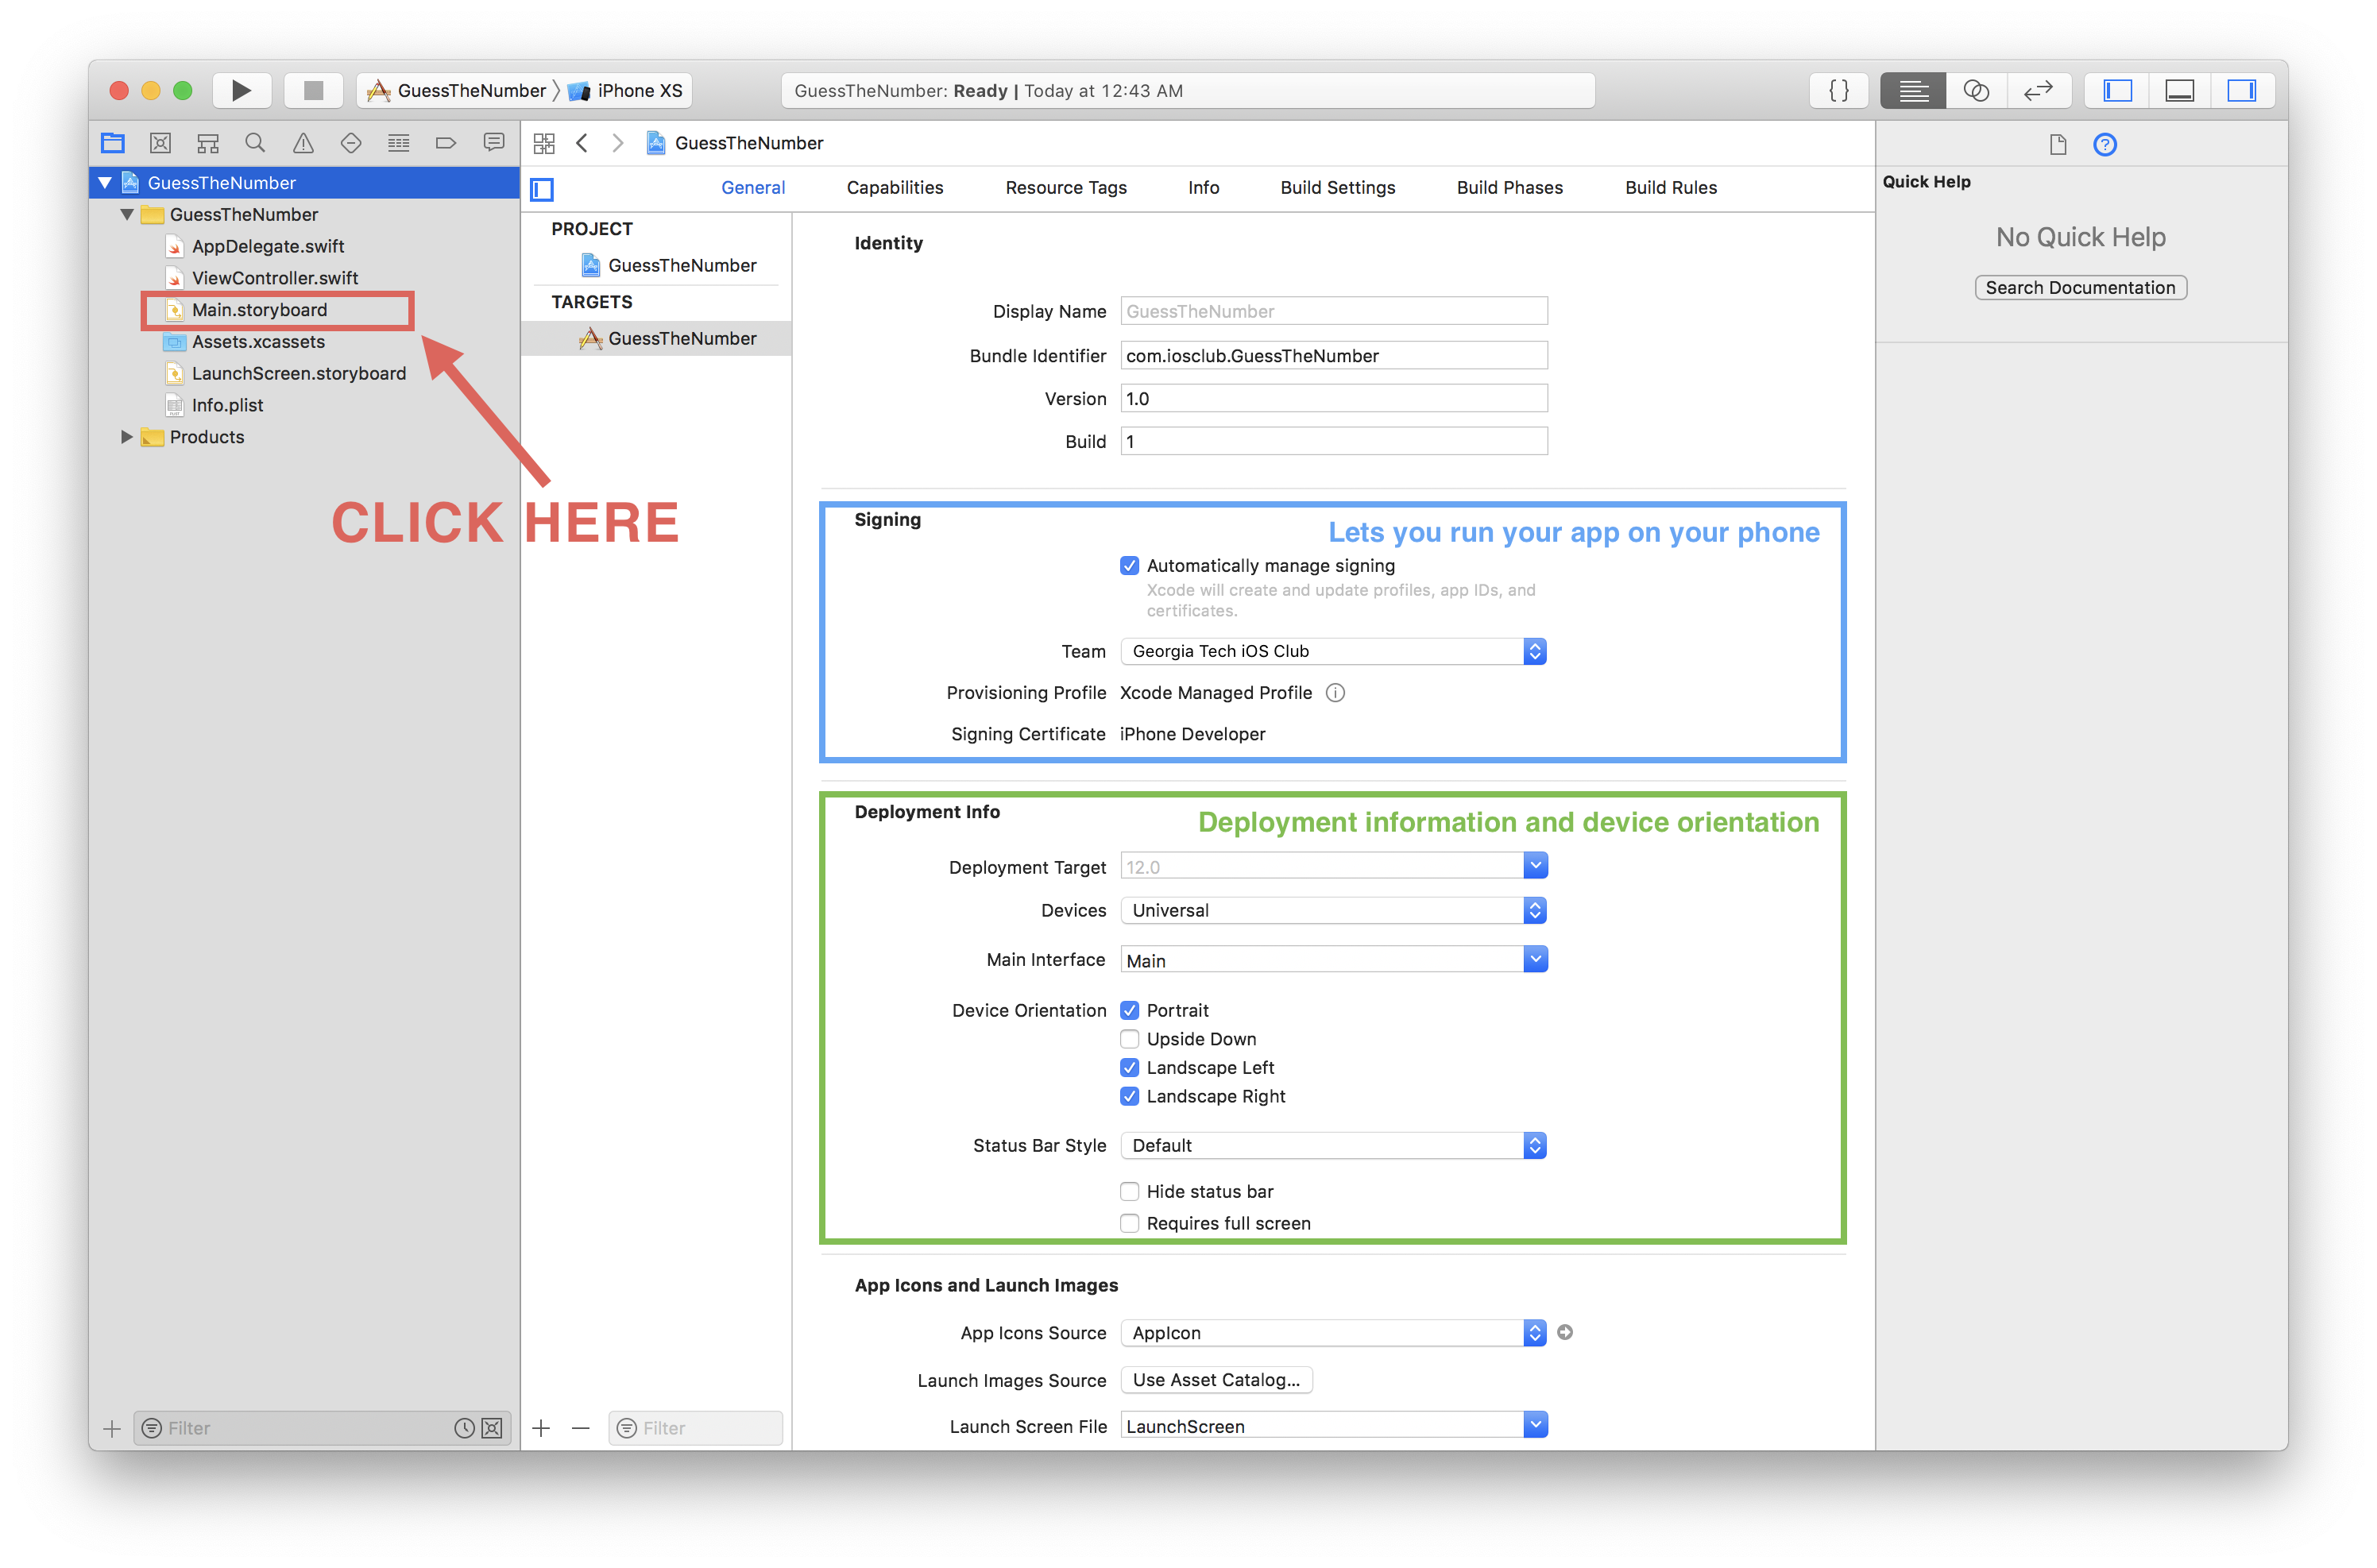
Interface builder is Xcode’s GUI editor. For most projects, the interface is contained in the Main.storyboard file. Open it up
and have a look around:
You should see something that looks like this. There are three important parts worth knowing:
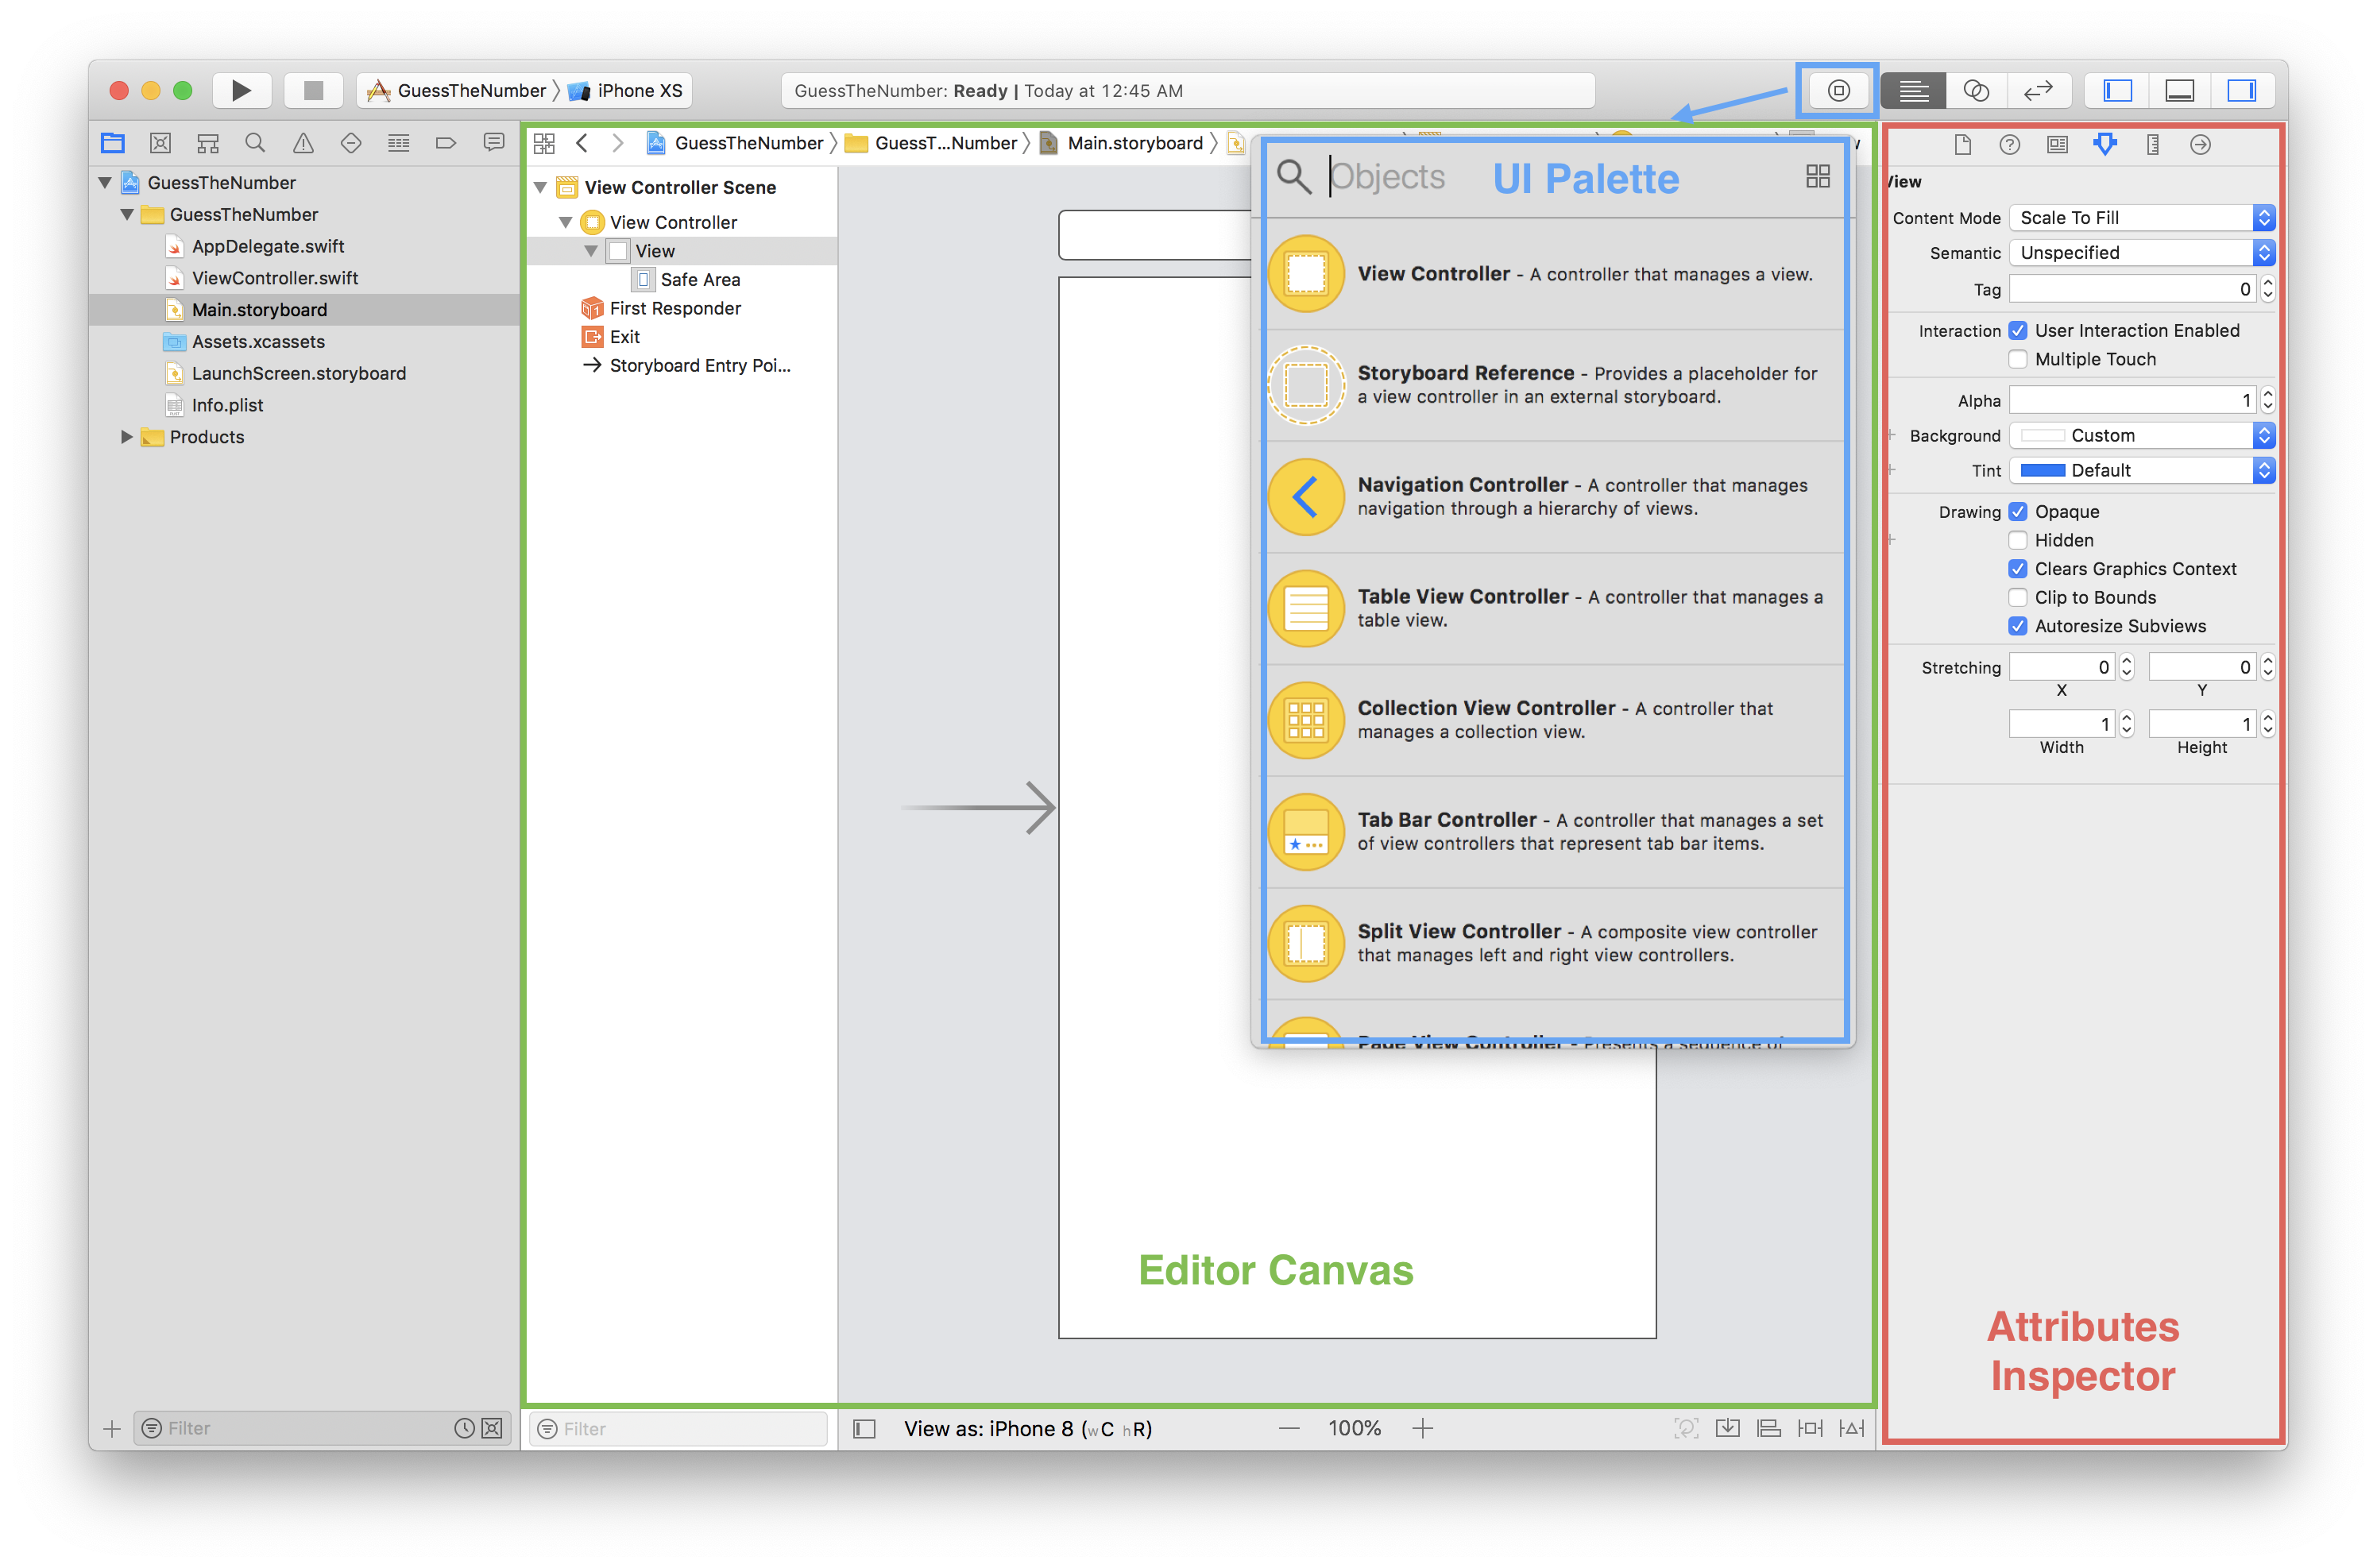
- Editor Canvas: This is where you design your layouts. What you see here is what you will get when you run the app on your phone, to an extent.
- The Inspector: This pane is where you modify anything and everything. It shows options for whatever you have selected.
- UI Palette: After clicking on the object library icon that resembles a hollowed coin, Xcode reveals a floating UI palette. Here, you will find many UI components that can be used to build the app’s interface.
That screen in the middle is your first View Controller. Any changes you make to this view will appear on your screen when you run the app.
Notice in the bottom left corner of the Editor Canvas a button that says View as: iPhone 8 (wC, hR). If you click on it it should pop up your Size and Orientation panel:
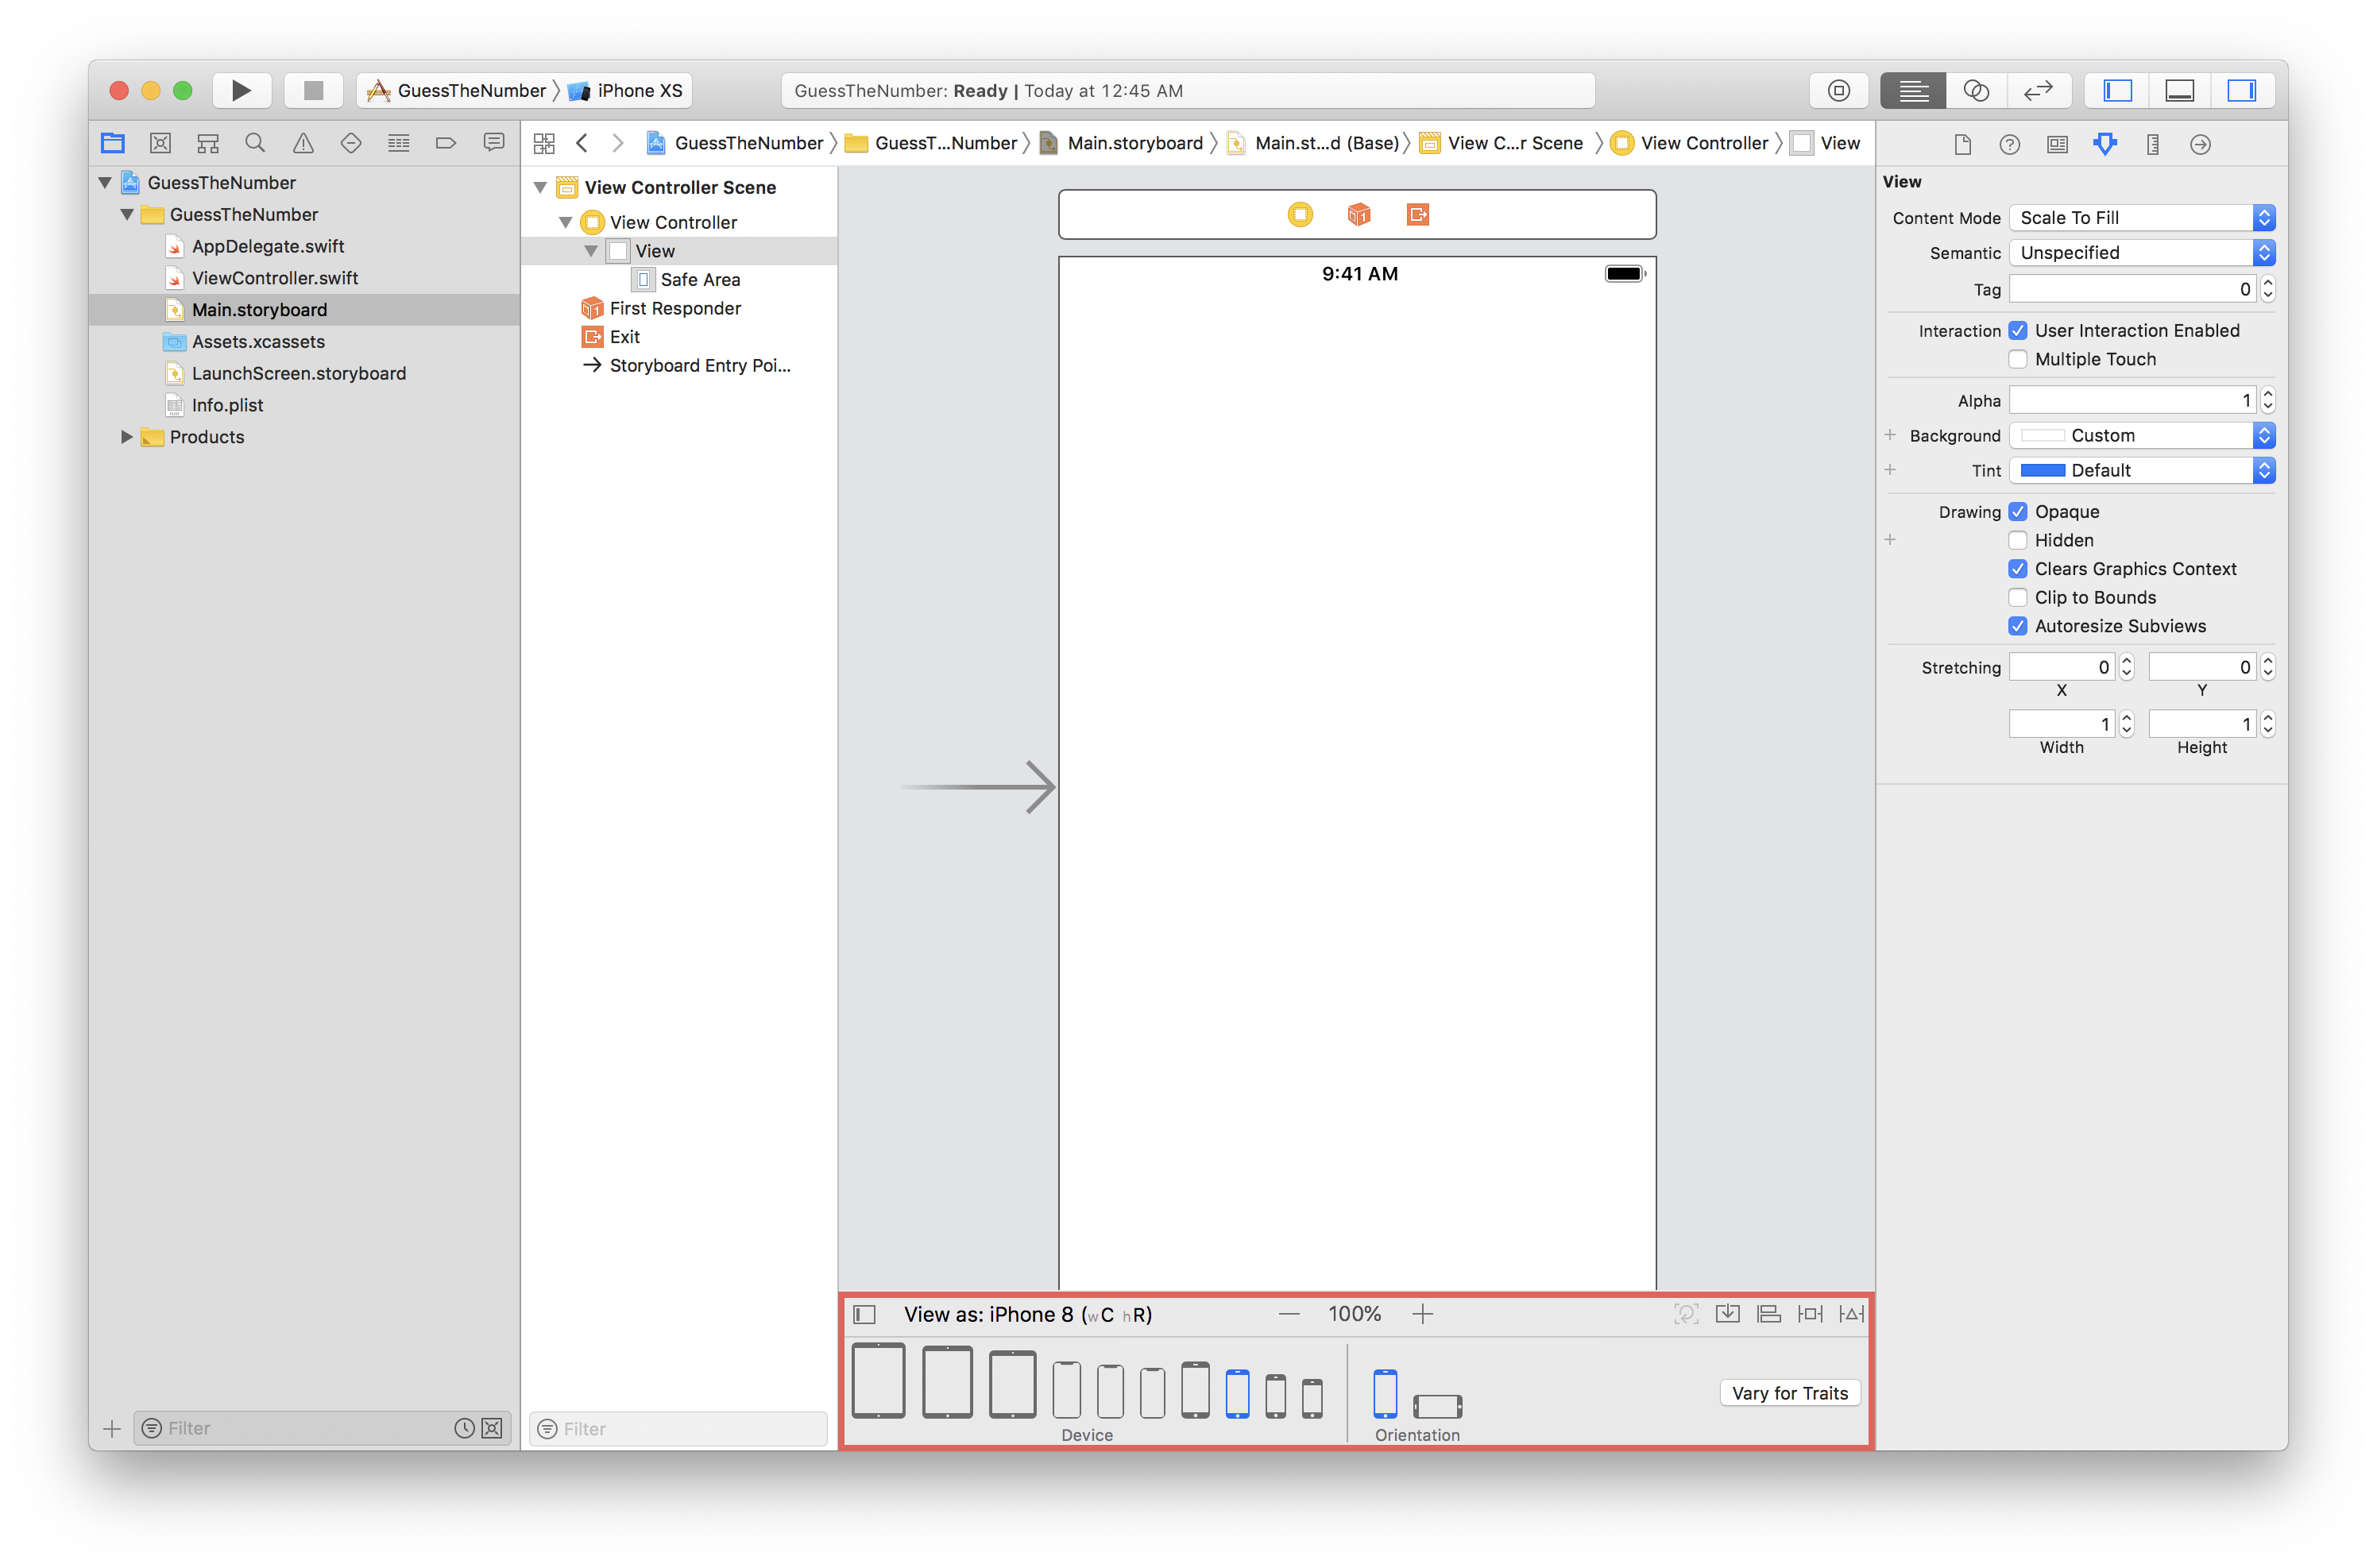
Here is where you can view your app in different screen sizes and orientation. The cool thing about Xcode is that you can layout your views to fit any screen size and orientation, all on one app. For the purpose of this tutorial, keep the setting at iPhone 8.
Now, for this Guess the Number game, there are 3 parts in the interface we’re building:
- A label to display the title of the game
- A text field to input your guess
- A button to submit your guess
Let’s start building the screen!
You’re a label, ‘arry
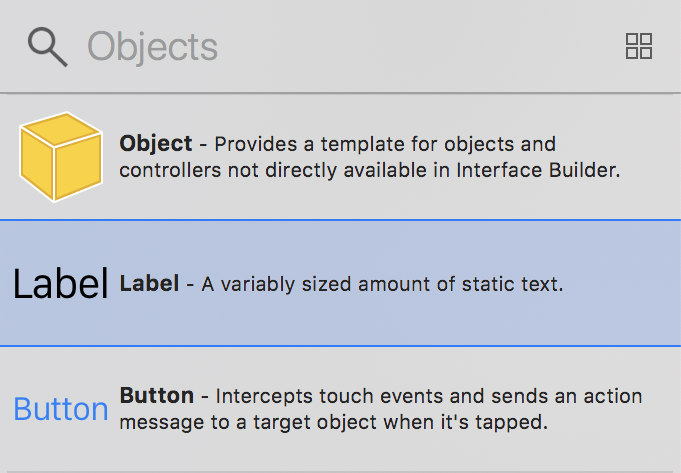
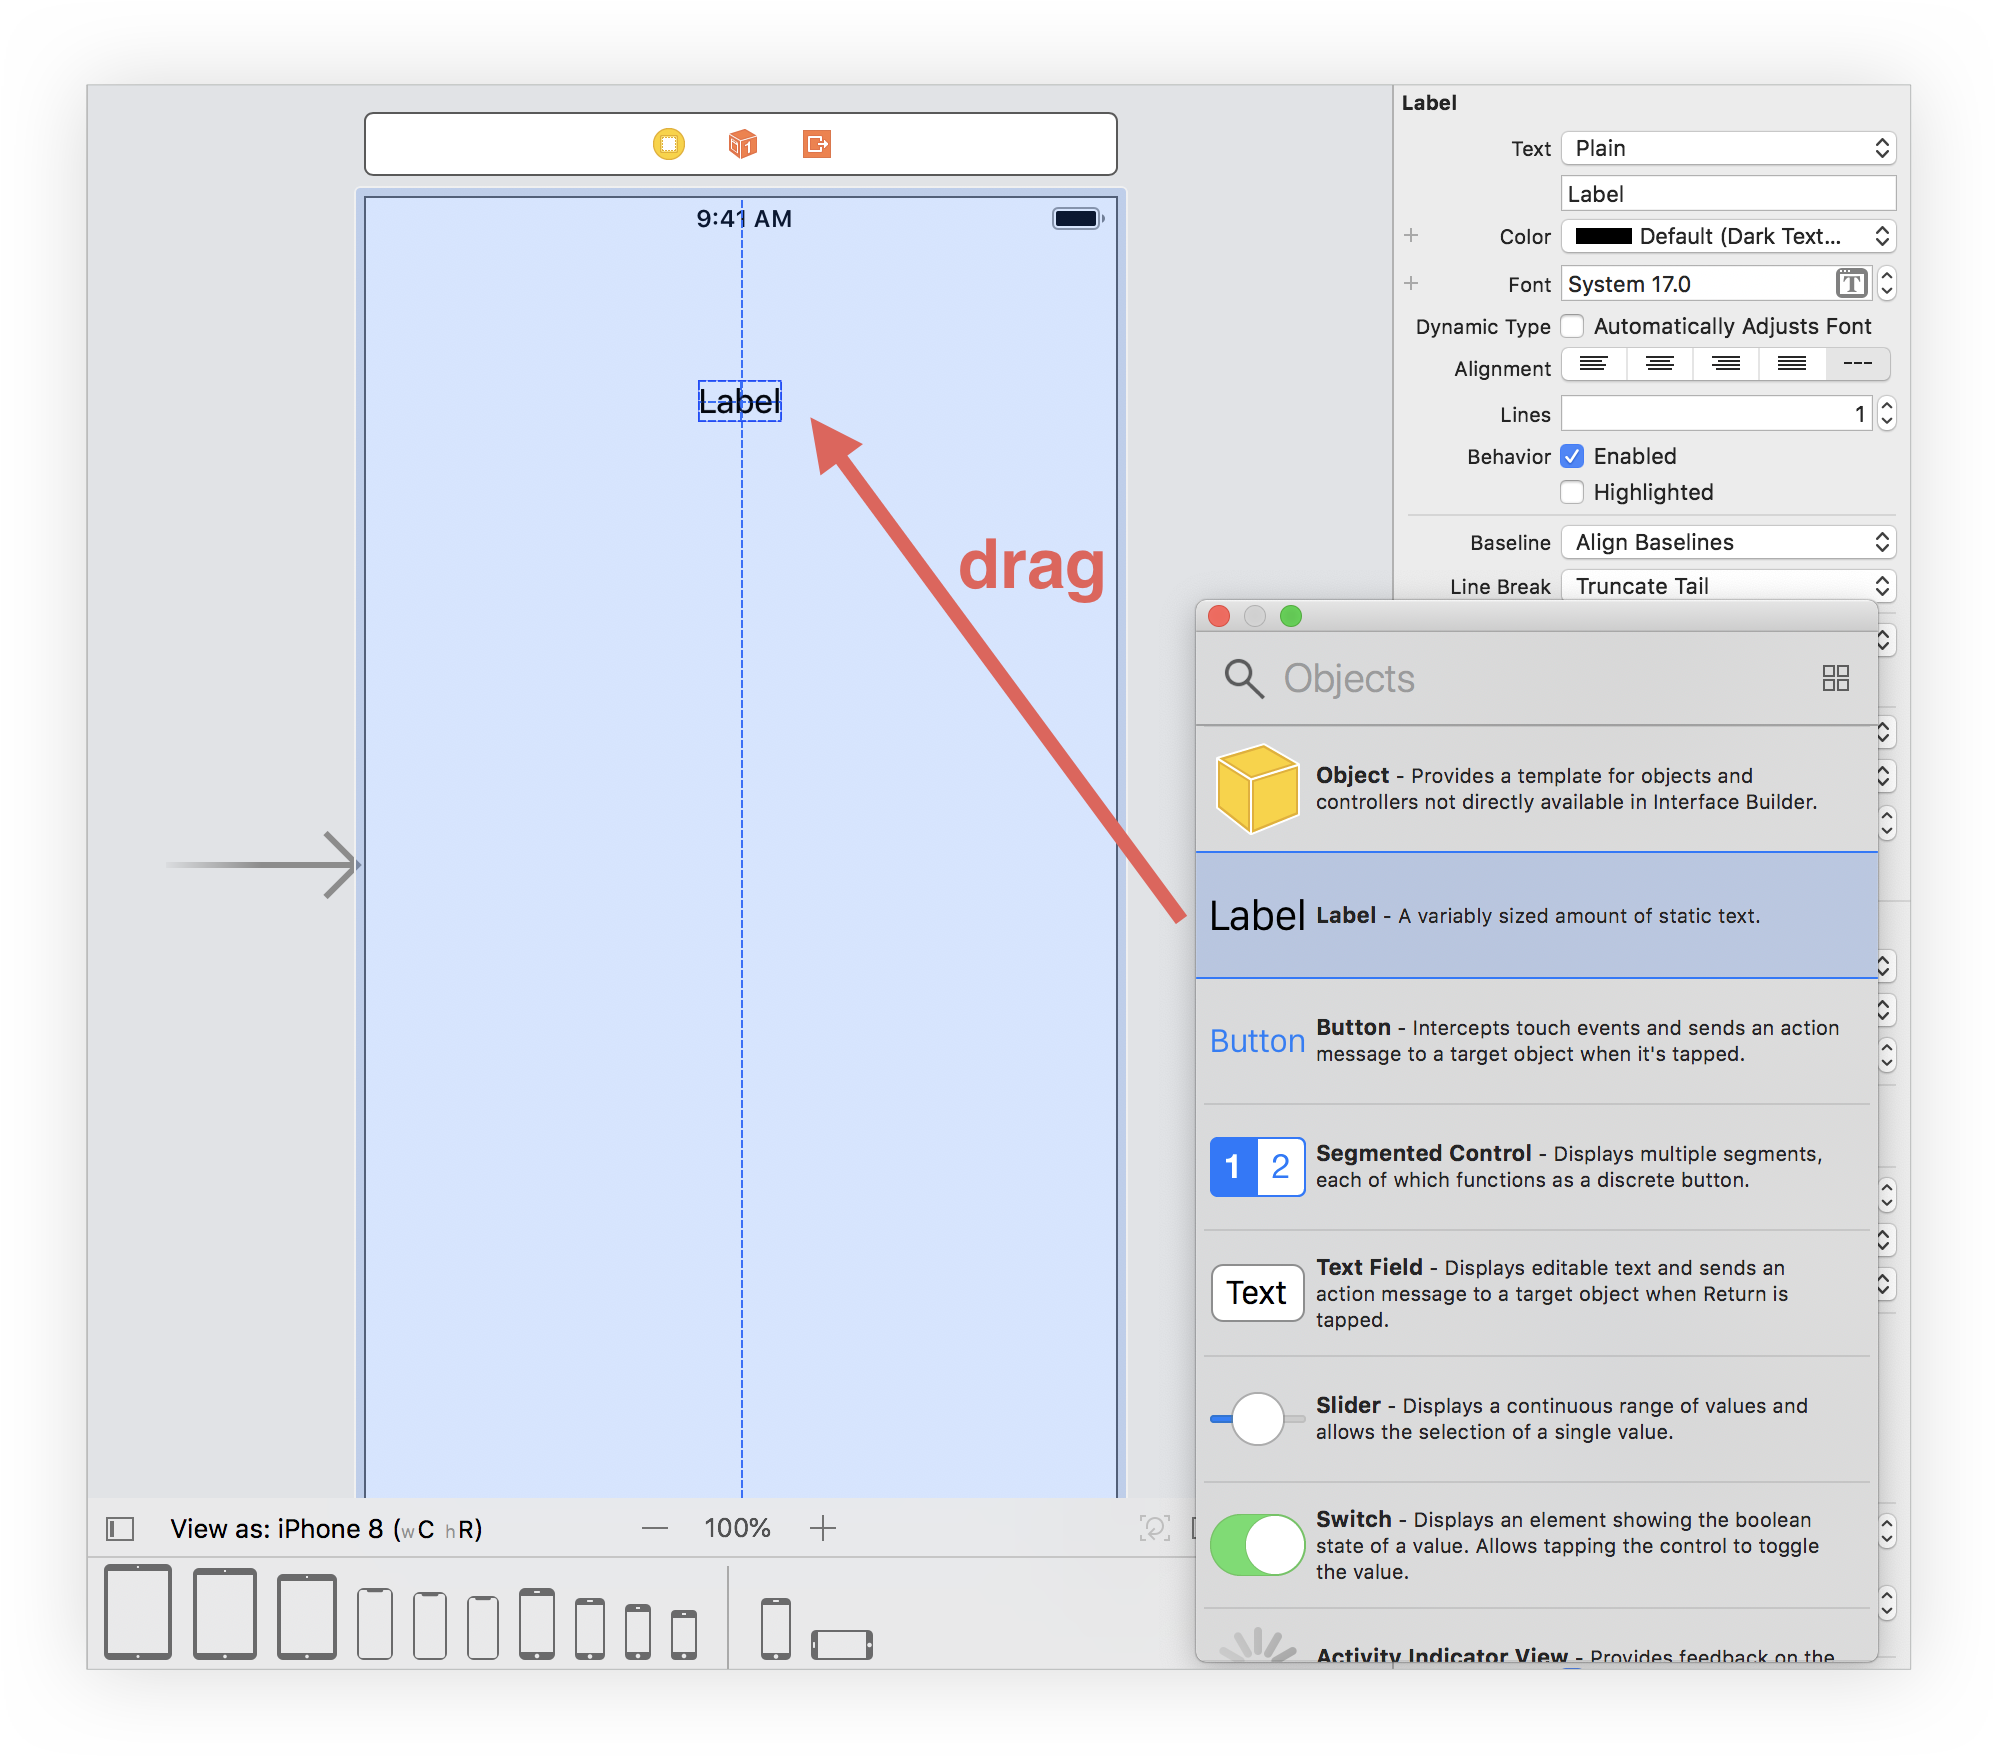
In order to display the title of the game, we are going to work with the Interface builder and the UI Palette. Scroll through the UI Palette until you find Label:
You can drag components from the UI Palette into your View Controller. Go ahead and drag a Label over and drop it on somewhere on the view. The process should look something like this:
Voila! There is a label now on your screen! You can actually customize the label by clicking on it and going to the Attributes tab on the right of the screen:
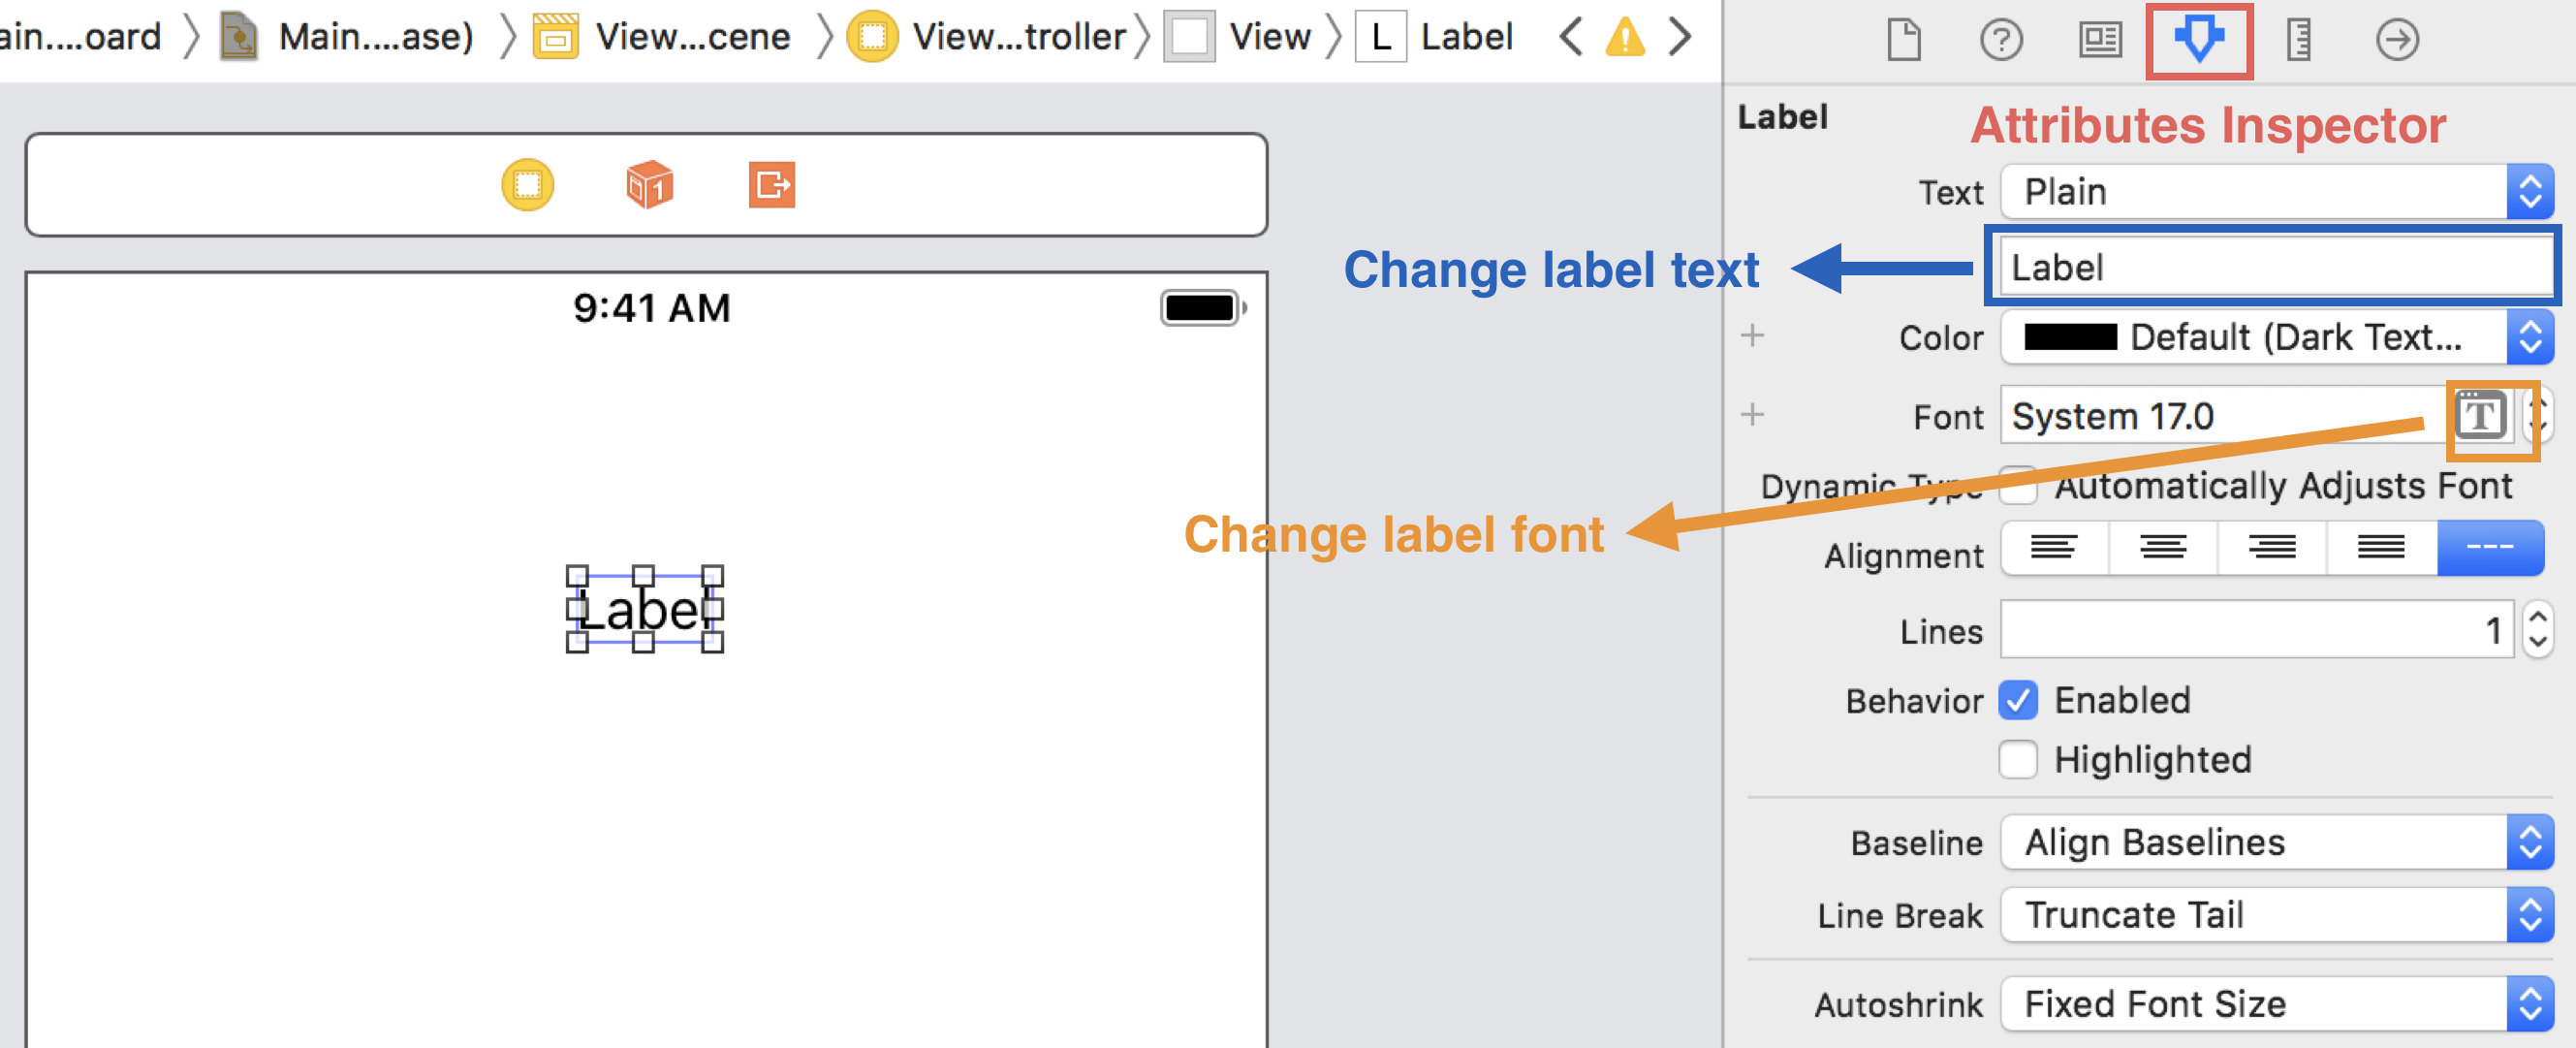
Here at the Attributes tab, you can edit the text of your label, the color, the font, the size, and many more! For this tutorial, edit the text of the label so that it reads Guess the Number.
Now, in order to actually input a guess, you will need a Text Field, and you will also need a Button in order to submit your guess. From the UI Palette, drag a Button and Text Field to your screen. Also edit the textfield and the button in any way you want. For this tutorial, edit all the features in the view so that it looks like this:
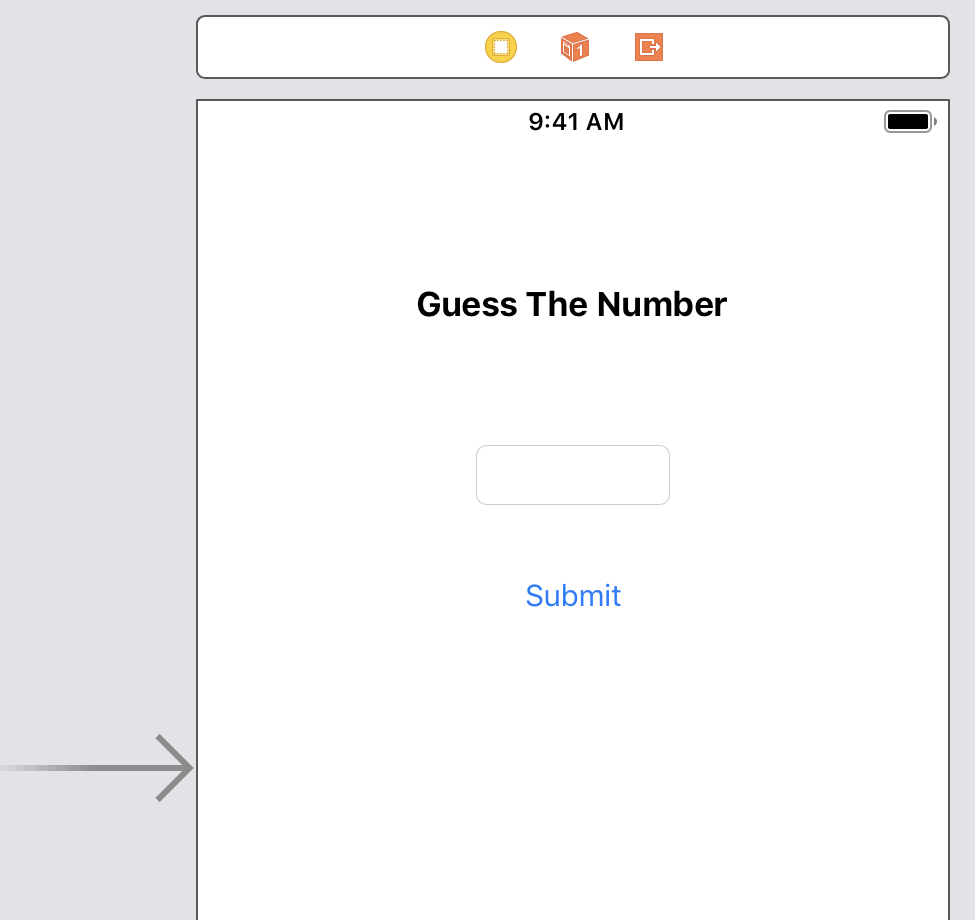
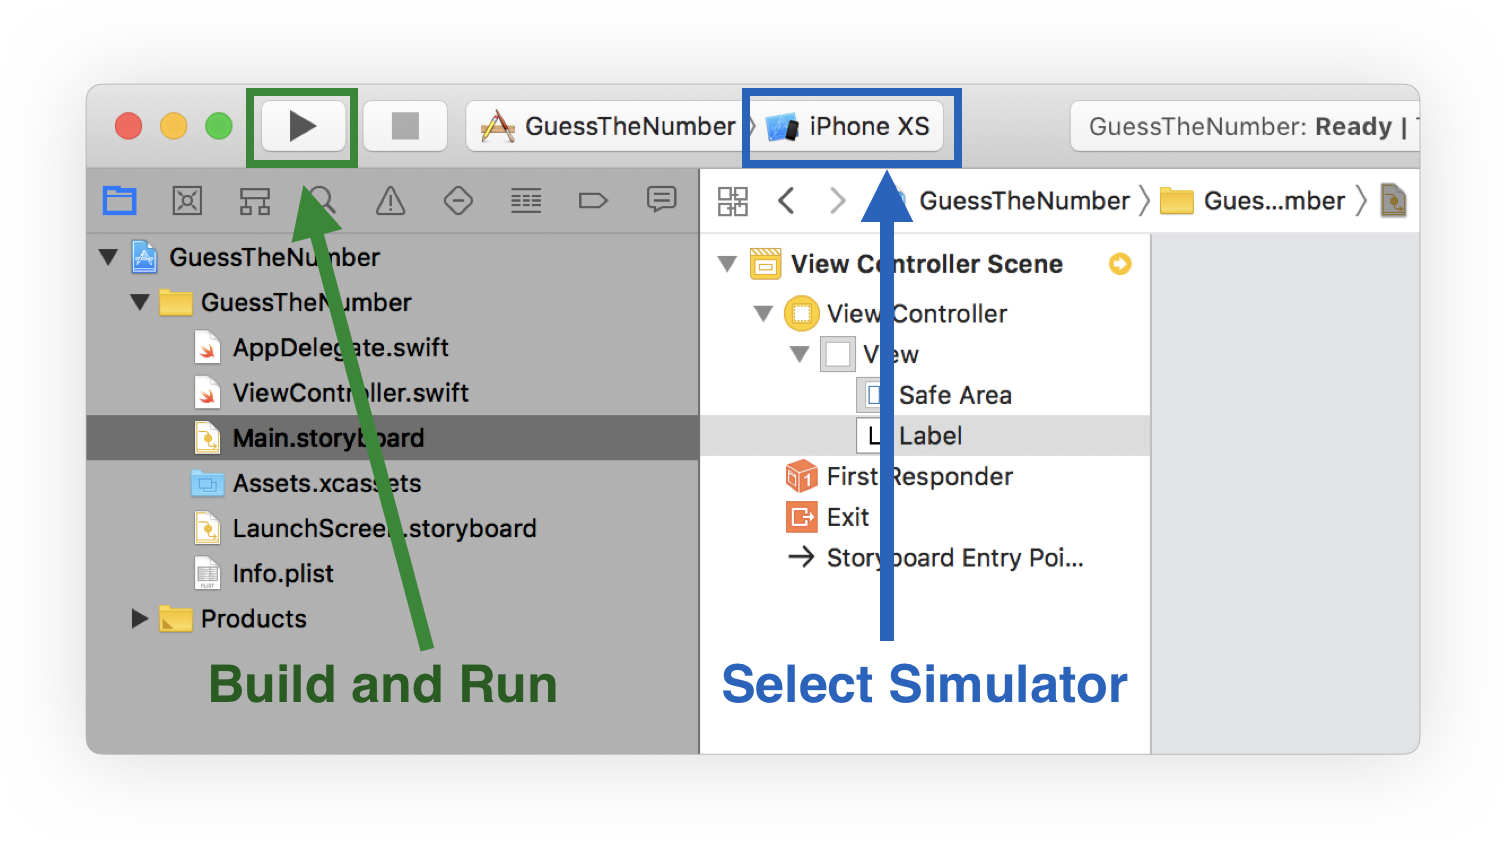
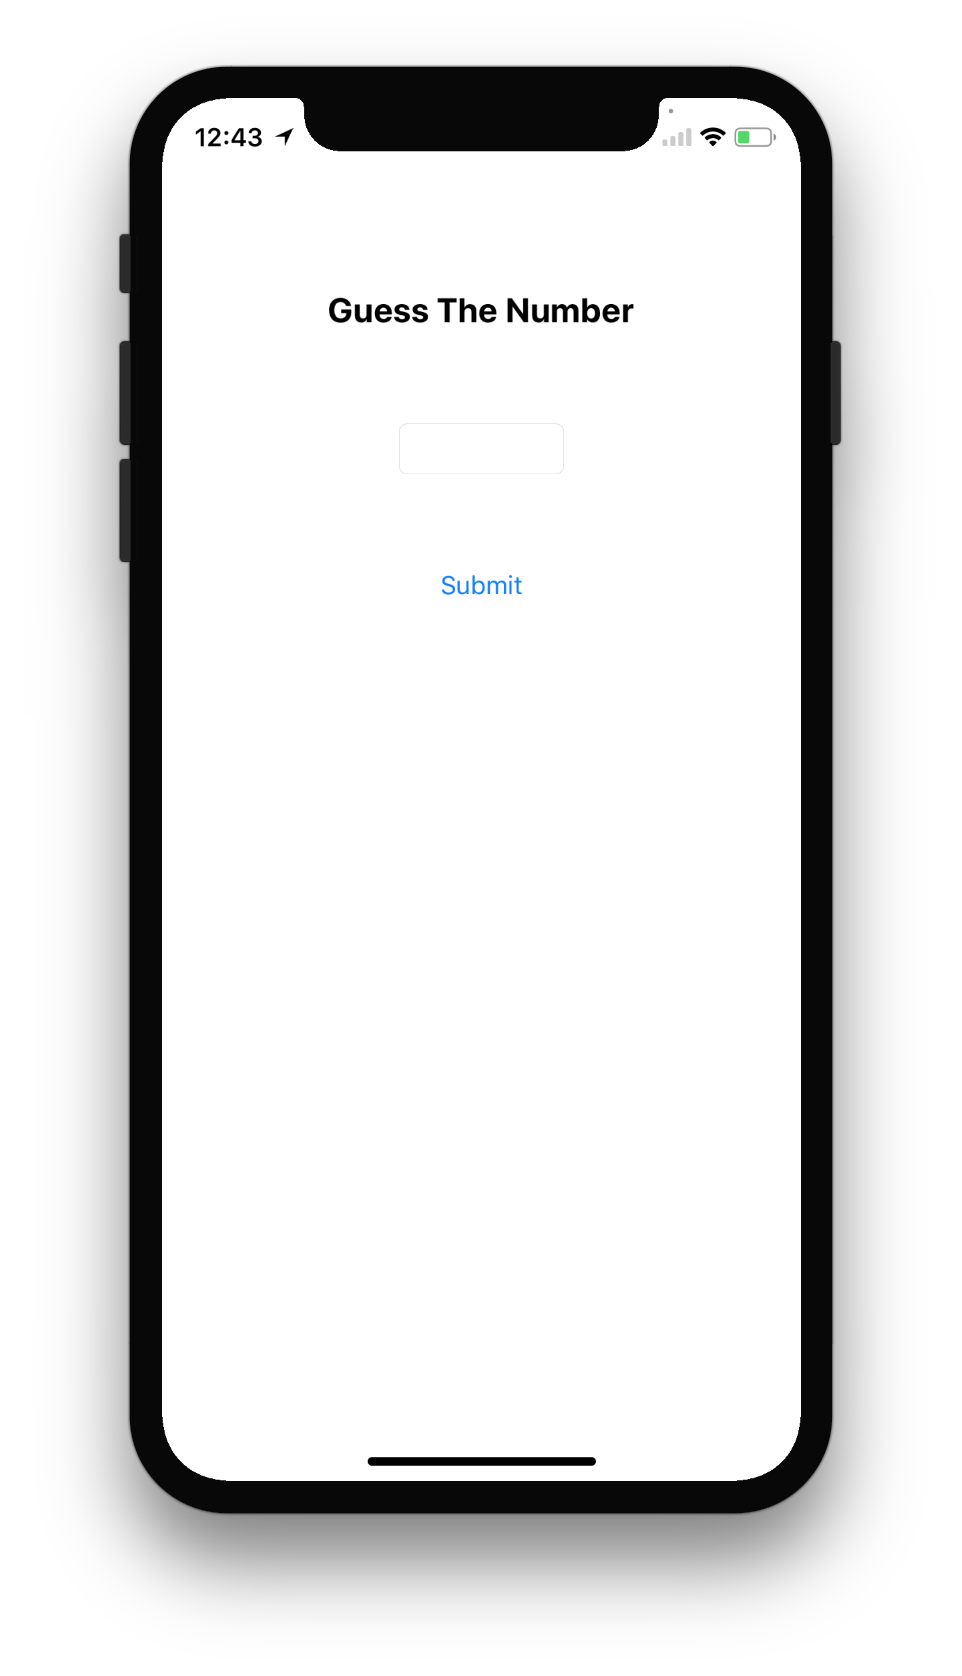
Awesome! Now we have our view! If you run the application on the simulator, then you should be able to see the image above as the final layout on your phone! On the top left of Xcode, select iPhone XR, iPhone XS or iPhone XS Max in the device/simulator dropdown and then press the Play Button.
While this is great progress, we still need to be able to actually provide functionality to the app.
Accio Linking!
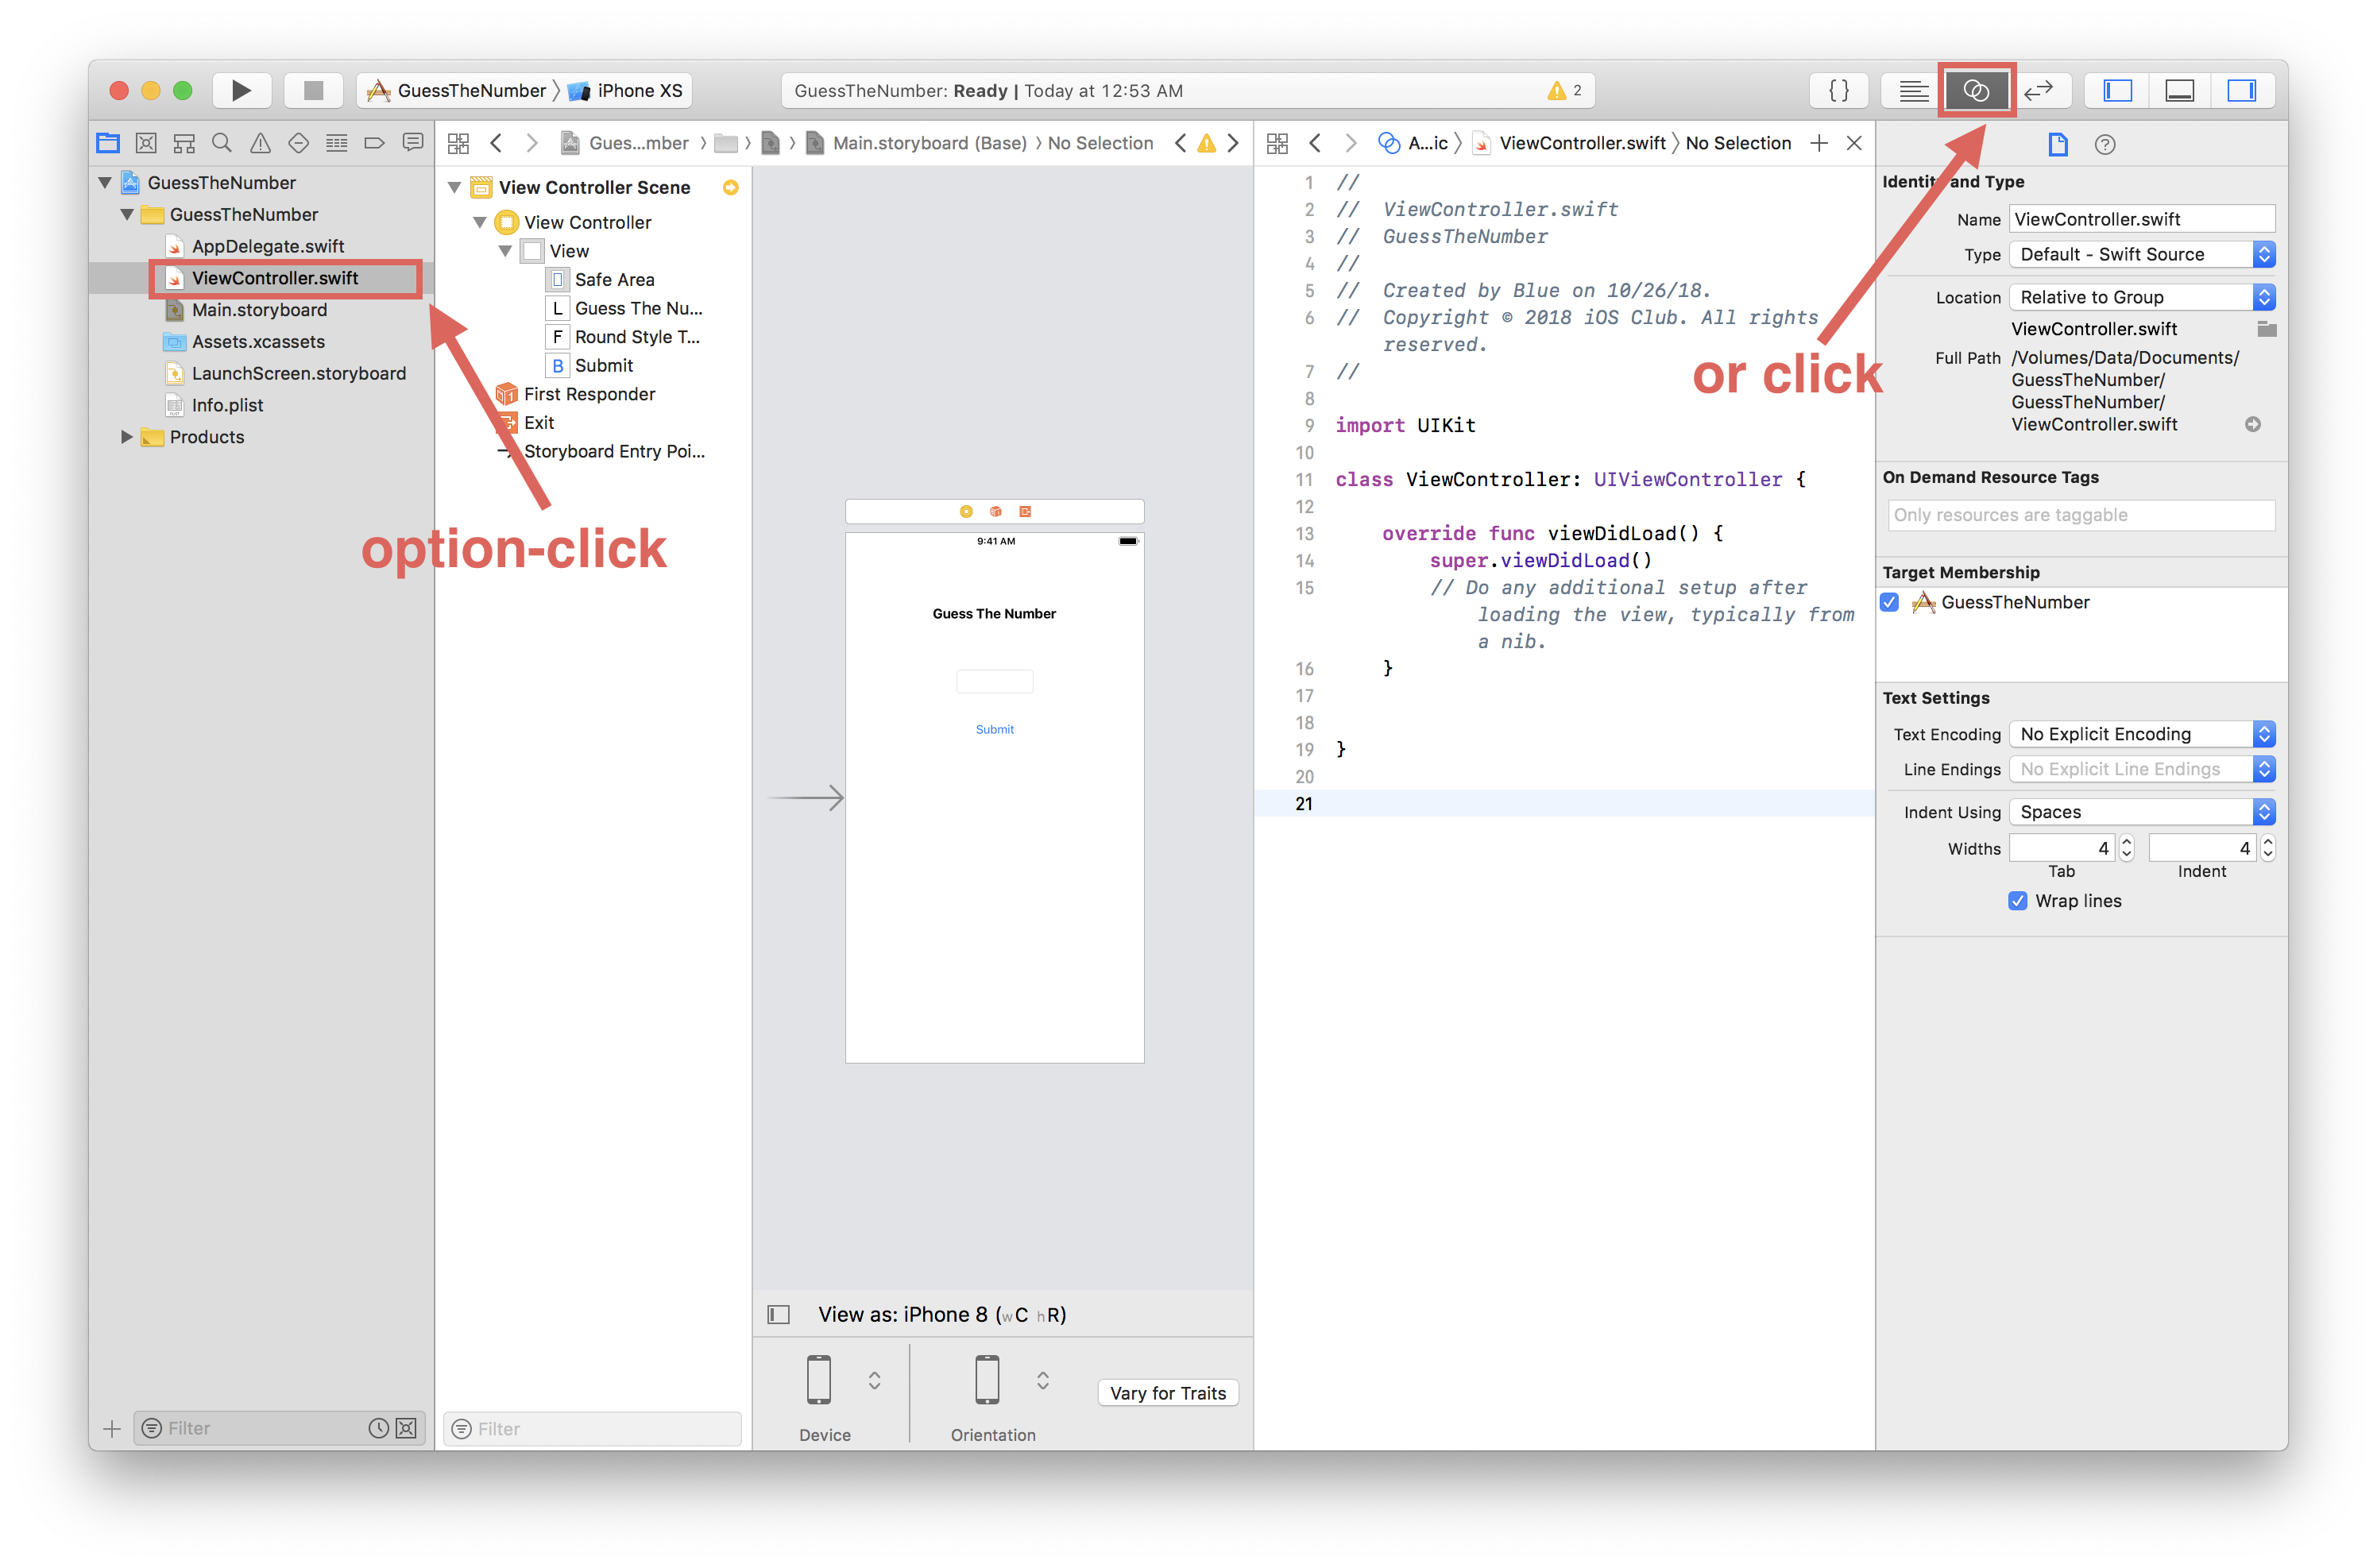
In order to provide functionality to the app, there must be a way to connect the label, text field, and button to actual code. Luckily, there is a way! The ViewController displayed in front of you is automatically connected to a file called ViewController.swift. Before you open the file up, first click on the view you have in front of you. Now, at the top right corner of the Xcode interface, there is a toolbar. Go ahead and click on what looks like two circles intertwining. Alternatively you can option-click on the file you want to open in order to do the same thing.:
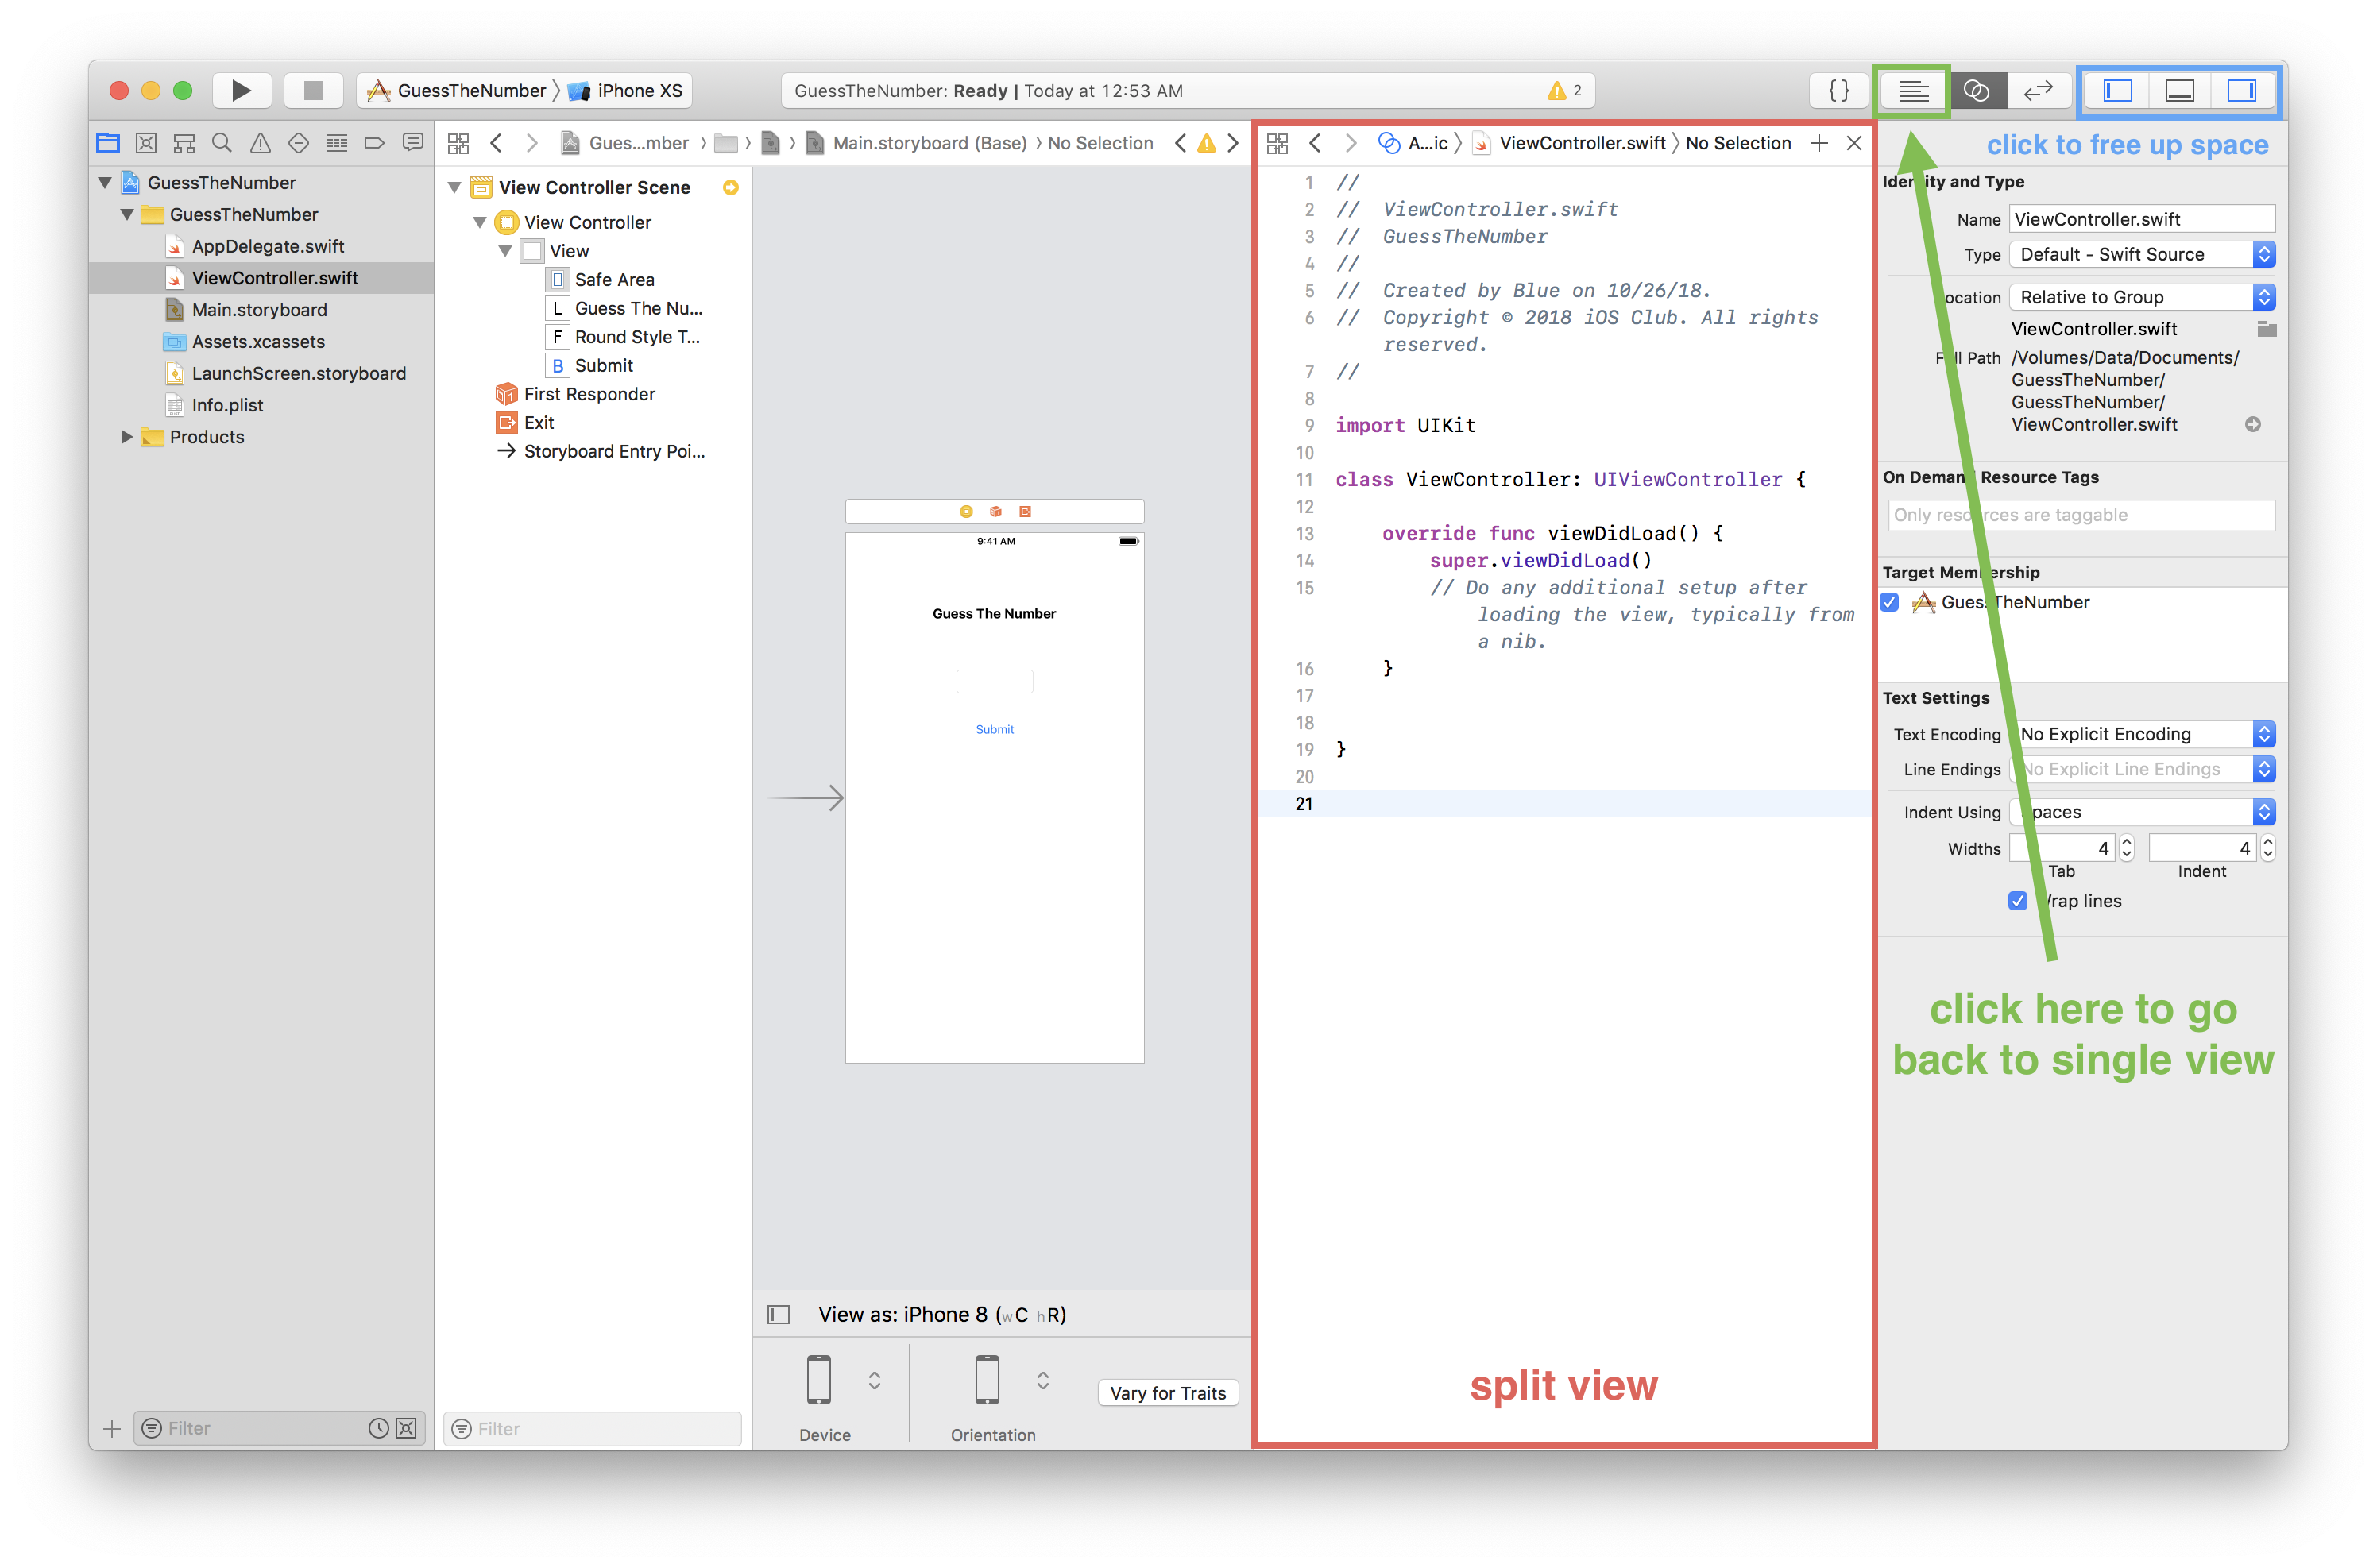
This allows you to see both the view from the storyboard and the swift file connected to that view simultaneously. You should be on the ViewController.swift file.
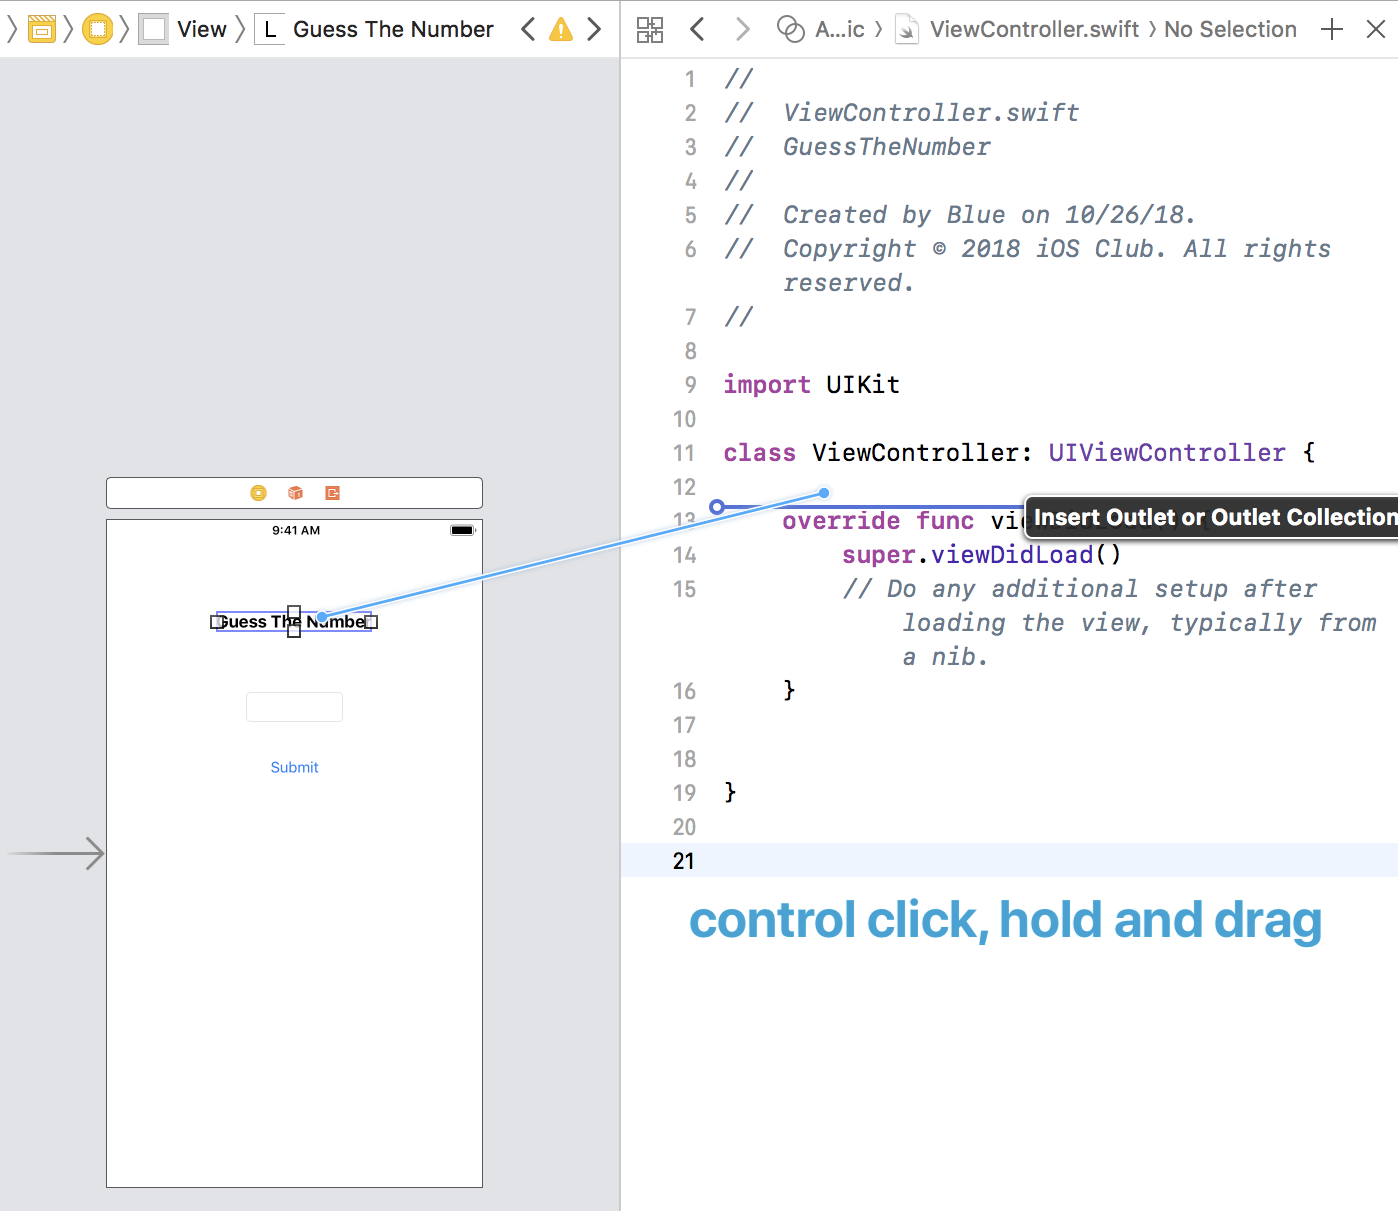
Now, let’s start with linking the label in our ViewController to the actual Swift code. In order to do this, you click on the label, control-click-hold on it, and drag your mouse to the swift file. A blue line should appear. Insert your IBOutlet right above the viewDidLoad() function like so:
Then, once you release the blue line, a little screen will pop up as such:
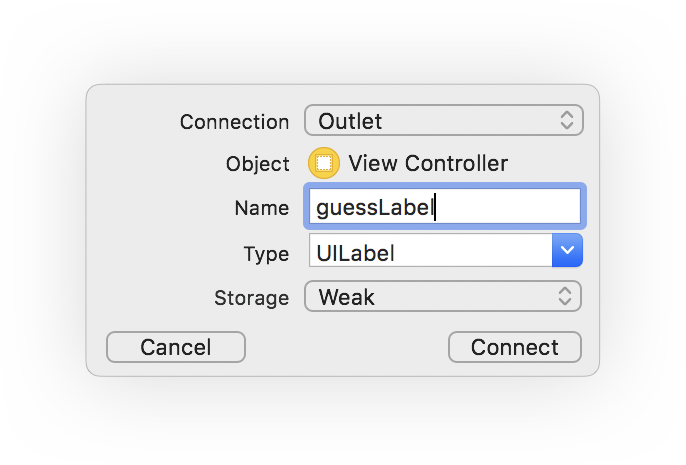
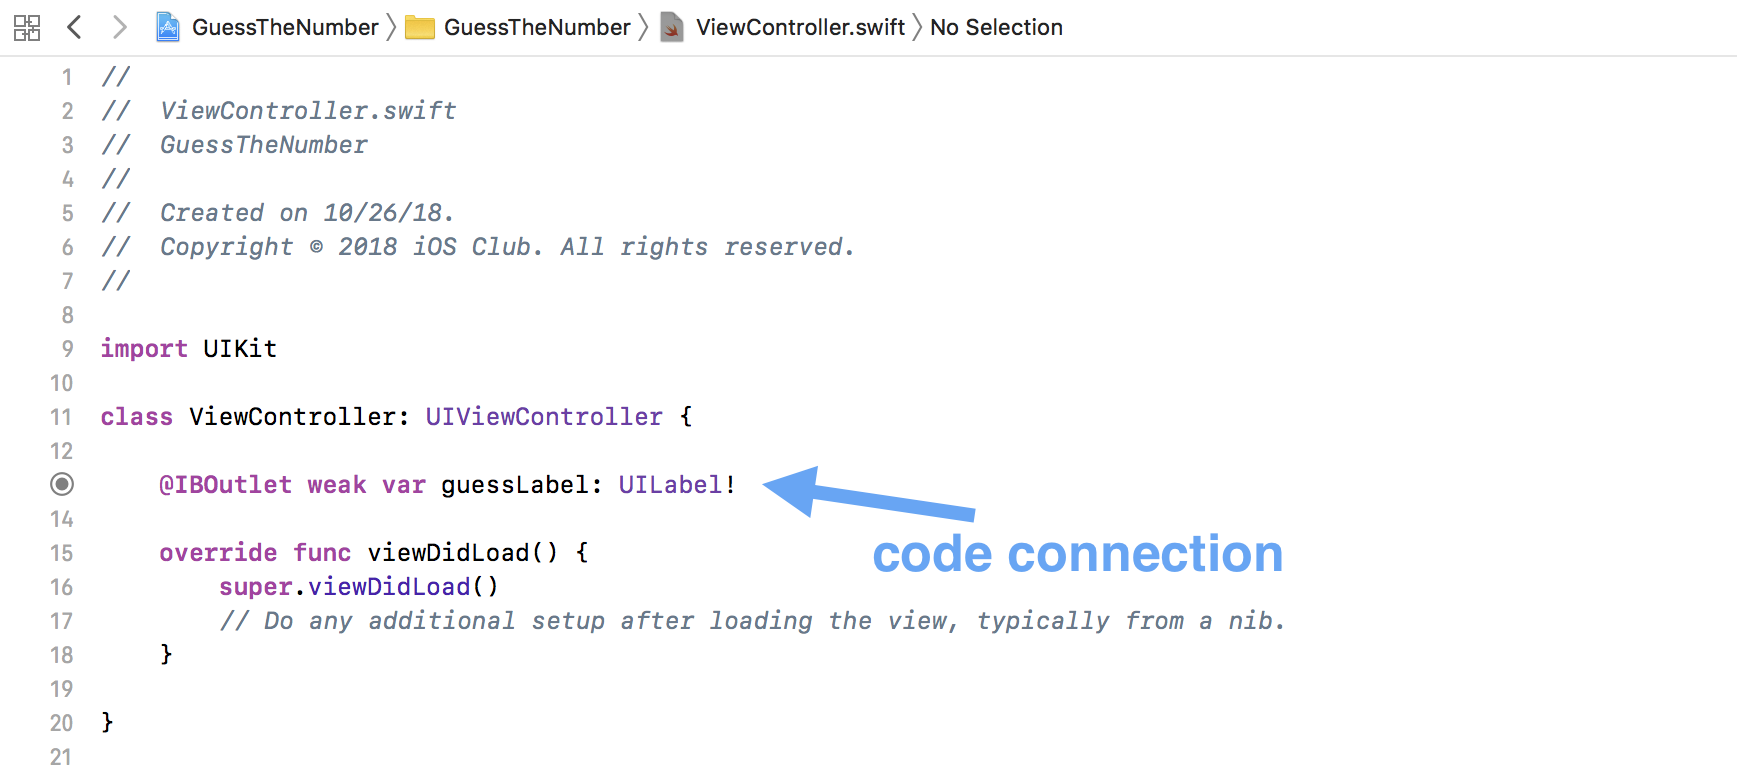
With this screen, you can specify what type of connection you’ll make between the label and the code. The type of connection we will need for the label is an IBOutlet, which just allows you to edit the label within the code as needed. Go ahead and name the connection guessLabel, and then click on Connect. The end result should look like this:
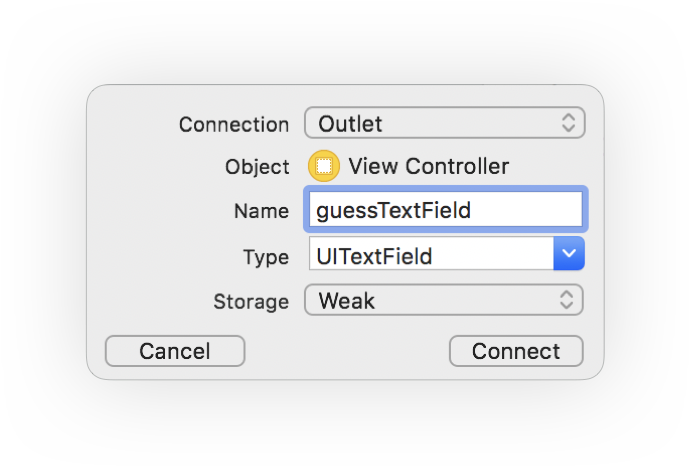
Do the same linking process to the text field in the view, and name that connection guessTextField.
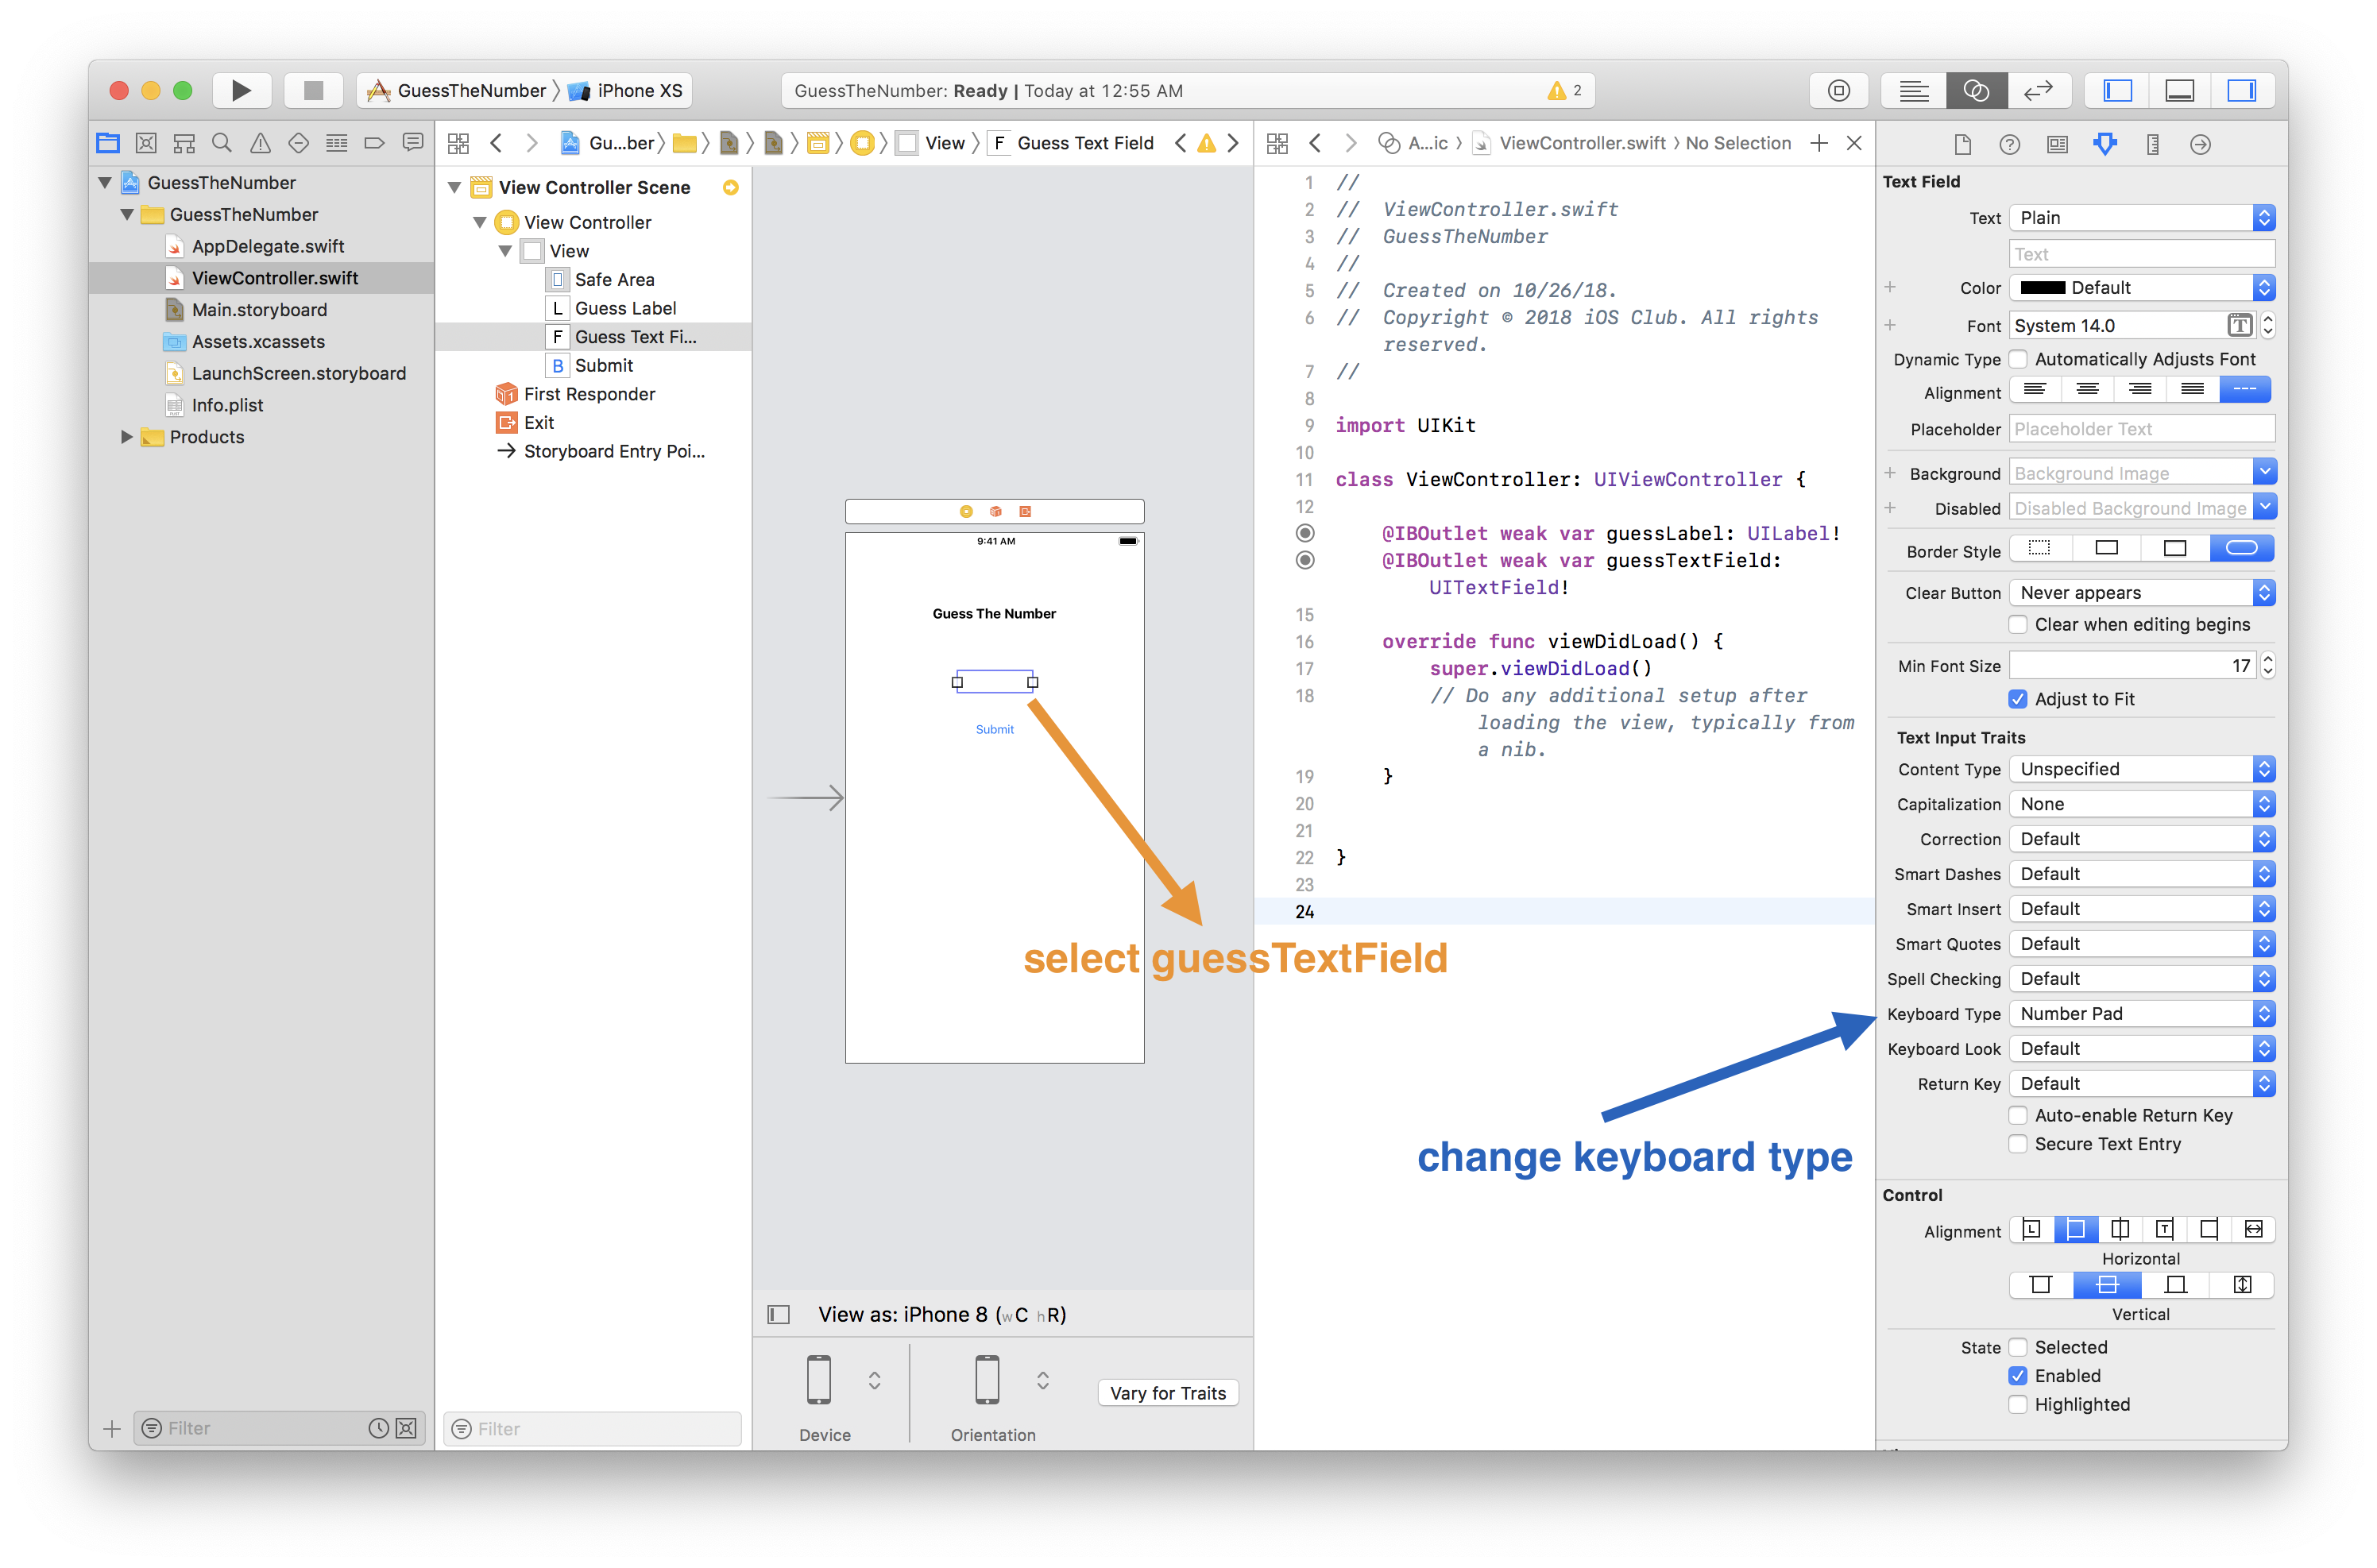
Then go to the Attributes tab for the text field and scroll until you find Keyboard Type. Change it to Number Pad. This will only allow numbers to be inputted into the text field.
Next Time
Awesome! Now we have added connections for both the label and the text field to Swift code! In the next part, we will be adding some functionality for generating a random number to guess, and we will also be connecting the button to the code.


