Saving notes
Currently users of our app can edit notes but they can’t save the changes they make. Let’s add a save button in the top right corner which when pressed updates the existing note or creates a new note.
Each UIViewController inside of a UINavigationController has access to a UINavigationItem that controls the top navigation bar.
We’re going to add a save UIBarButtonItem to the right side of our navigation bar.
Open NoteViewController.swift and in viewDidLoad create a save button with the built-in “save” item.
override func viewDidLoad() {
    super.viewDidLoad()

    configureUI()

    let saveButton = UIBarButtonItem(barButtonSystemItem: .save, target: self, action: #selector(save))
    self.navigationItem.rightBarButtonItem = saveButton
}
When the button is tapped it will call the method defined by action on the object target. In the case above, the button will call “save” on NoteViewController.
Problem! We don’t have a save method yet so the compiler should be complaining at you. Let’s go ahead and fix that.
@objc private func save() {
	// TODO: Implement saving
}
You may be wondering what the deal is with the @objc keyword. The keyword basically tells the compiler that you need the function available using #selector().
Let’s go implement our save method. If we have an existing note just modify the fields. Otherwise create a new Note object.
    @objc private func save() {
        let newTitle = self.titleTextField.text ?? "New Note"
        let newBody = self.bodyTextView.text ?? ""
        if let note = self.note {
            note.title = newTitle
            note.body = newBody
            note.lastUpdated = Date()
        } else {
            let newNote = Note(title: newTitle, body: newBody, lastUpdated: Date())
        }

        // Go back to the list of notes
        let _ = self.navigationController?.popViewController(animated: true)
    }
After the user hits the save button they probably expect to go back to the previous screen. The last line access the UINavigationController and tells it to remove the current UIViewController (the NoteViewController).
If you build and run the app, you will see your changes when you modify the notes, save them and reselect the same note.
Adding Notes
You’ve probably noticed that the only way to get to the Note View Controller is by tapping on an existing note… we can’t actually add new notes. Let’s go fix that!
Open up Main.storyboard and select the segue which transitions from NoteListTableViewController to NoteViewController. Set the identifier to “Note Segue”.
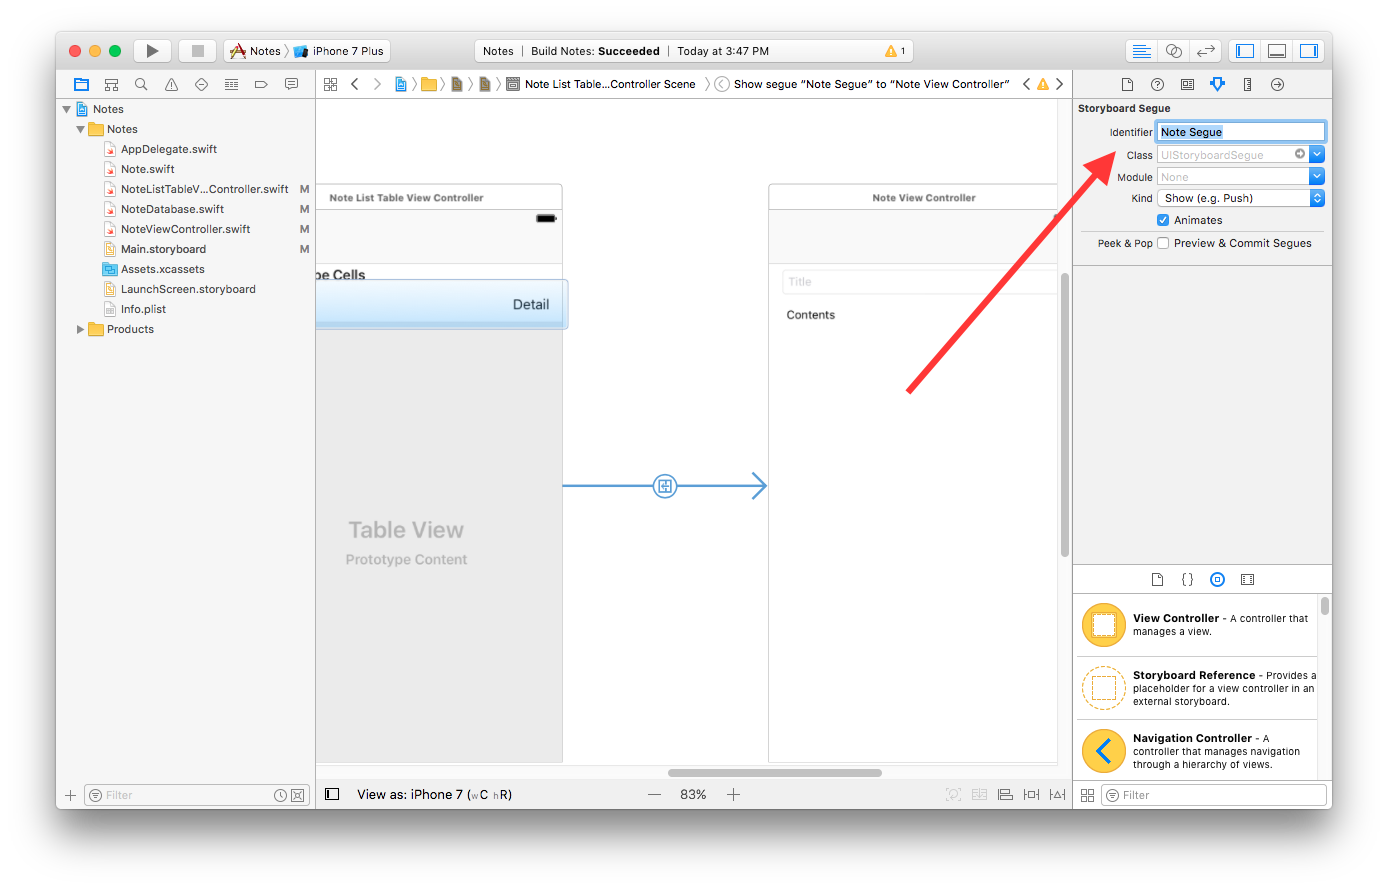
After you have set the segue identifier open up NoteListTableViewController.swift.
We’re going to put an add UIBarButtonItem in the top right corner just like we did with the save button.
override func viewDidLoad() {
    ...
    self.title = "Notes"

    let addButton = UIBarButtonItem(barButtonSystemItem: .add, target: self, action: #selector(newNote))
    self.navigationItem.rightBarButtonItem = addButton
}

@objc private func newNote() {
    self.performSegue(withIdentifier: "Note Segue", sender: nil)
}
The newNote() function is the code version of creating a segue in the storyboard. We’re triggering the same segue that occurs when cells are tapped but instead triggered from code.
Passing notes back
You have probably noticed that the notes in the Table View haven’t been updated when you go back to the previous screen.
We’re going to tackle this problem by adding notification closures to our NoteViewController. Whenever a note is updated or created, we’re going to call the notification closures to whoever that a note has been updated/created.
What are closures? To summarize from the Swift website: Closures are self-contained blocks of functionality that can be passed around and used in your code.
Open NoteViewController.swift and declare these two variables below the note variable.
var note: Note?

var updateNotification: ((Note) -> Void)? // 1
var saveNotification: ((Note) -> Void)?	// 2
Next, call the closures inside of our save function
@objc private func save() {
    ...
        note.lastUpdated = Date()
        self.updateNotification?(note) // 1
    } else {
        let newNote = Note(title: newTitle, body: newBody, lastUpdated: Date())
        self.saveNotification?(newNote) // 2
    }
}
The first notification is called when the user saves a note. The second notification is called when a new Note object is created.
Open up NoteListTableViewController.swift and create two functions that will be called we want to reload a note and save a new note.
private func update(note: Note) {
    noteDatabase.update(note: note)
    tableView.reloadData()
}

private func saveNew(note: Note) {
    noteDatabase.saveNew(note: note)
    tableView.reloadData()
}
Now all we have to do is set the notification closure in prepare(for segue:)
if let noteVC = segue.destination as? NoteViewController {
    ...
    noteVC.updateNotification = self.update
    noteVC.saveNotification = self.saveNew
}
Build and run the app and you will be able to create, modify and view notes while all of the data is synched to the NoteDatabase.
Recap
You learned about UIBarButtonItems and added save functionality. Right after you learned how to trigger storyboard segues from code when you implemented adding new notes. Finally, you learned about closures and used them to update the Note List and the Note Database when notes were changed.


