So far we’ve been focusing on having the Table View display static content. Now that it can do that correctly, we can extend it to be dynamic.
Adding @IBActions
@IBActions are very similar to @IBOutlets, except actions represent functions. We can connect our add and subtract buttons to @IBAction functions. When the button is pressed, those functions will be executed.
Open up your code and storyboard side-by-side again. You want to control-drag from the subtract button to the code. This time, though, you want to change it from an outlet to an action.
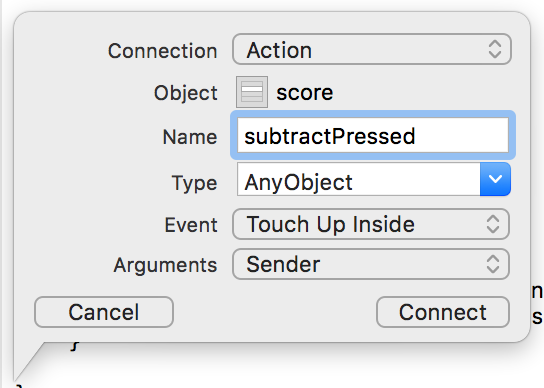
You can name the function anything you want, but it should definitely include a verb. Press connect, and you should get a function:
@IBAction func subtractPressed(_ sender: AnyObject) {

}
If you accidentally made an @IBOutlet, it isn’t enough to just delete the line of code. You must remove the outlet from the button’s Connection Inspector:
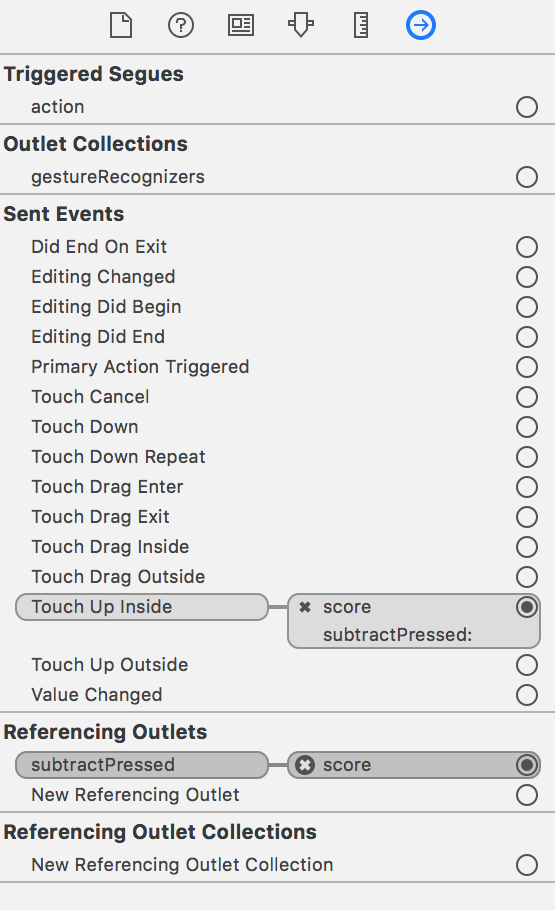
If you don’t remove the connection in the storyboard, your app will crash when you launch it. This is one of the most common bugs we see at iOS Club, but it’s easy enough to fix.
Repeat the process for your add button.
Saving the arguments from the decorate method
The add and subtract buttons are supposed to change the person’s score and then update the label, but we can’t change the person’s score if the buttons don’t know which person they’re controlling. The decorate method knows, though, so we want to hold on to that information. We can make a small change to that method:
var name: String!
var controller: ViewController!

func decorate(for name: String, in controller: ViewController) {
    let score = controller.scores[name] ?? 0
    self.label.text = "\(name): \(score)"

    self.name = name
    self.controller = controller
}
This way we can access the name and controller in our addPressed and subtractPressed methods.
Writing a helper method
The add and subtract buttons both do the same general operation: change the score and then update the label. The add button adds 1 to the score. The subtract button subtracts 1 from the score, which is really just adding -1.
We can write a helper method to do this instead of duplicating code between the two methods:
func updateScore(offset: Int) {
    var score = controller.scores[name] ?? 0
    score += offset
    controller.scores[name] = score

    self.label.text = "\(name): \(score)"
}
The method reuses patterns we’ve already seen elsewhere, so it’s easy enough to interpret. It retrieves the current score, updates it, saves the new value to the dictionary, and then updates the label.
We’ll update the add and subtract methods to use this new helper method:
@IBAction func subtractPressed(_ sender: AnyObject) {
    self.updateScore(offset: -1)
}

@IBAction func addPressed(_ sender: AnyObject) {
    self.updateScore(offset: 1)
}
Checking our progress
Everything should be in place for the user interaction. Run the app in the simulator and check it out.
Everything looks normal at first, but then we start pressing the buttons:
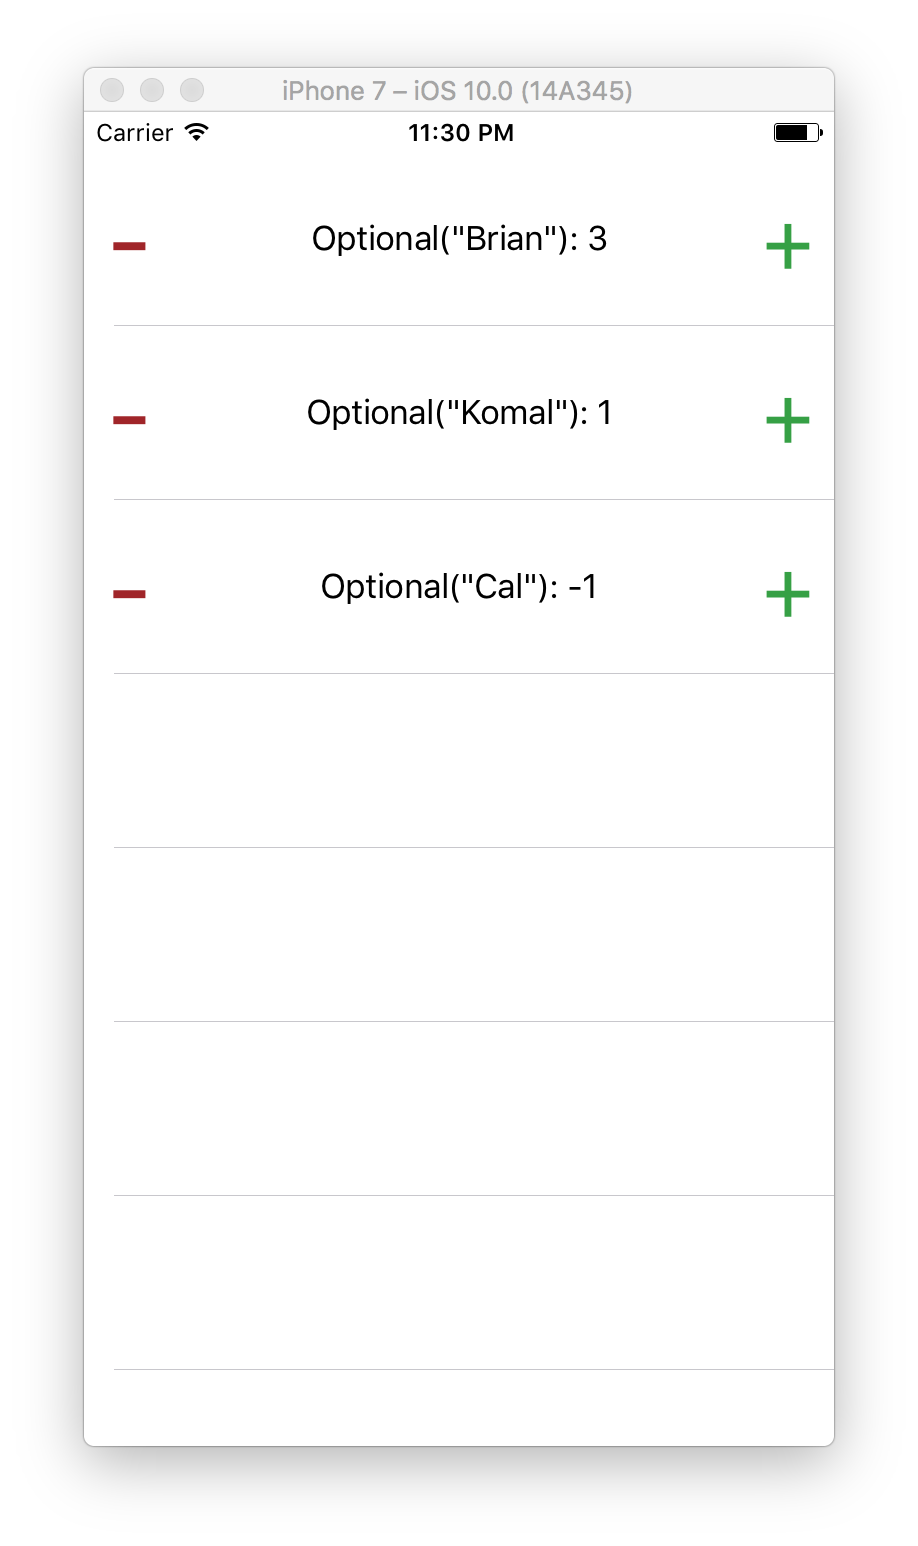
Brian has turned in to Optional("Brian"). This is Swift being particularly cautious.
When we reference name in the updateScore method, we’re referencing the class’s var name: String!. The type String! is an Implicitly Unwrapped Optional, meaning it may be nil but Swift will let you interact with it as if it’s a non-optional String type. This effectively erases the safety benefits we get from working with optionals, but is useful in contexts where we know something won’t be nil by design.
In some situations, Swift takes the safe approach and treats String! like String?. In that instance, Brian turns in to Optional("Brian"). We need to unwrap the optional value so it’s unambiguously non-nil.
We’ve used the nil-coalescing operator before, and this is another situation where it shines. We can change the line in updateScore to self.label.text = "\(name ?? "Unnamed Person"): \(score)". That way, in the off-chance that name is somehow nil, it will be replaced with "Unnamed Person".
If we run the app again, we see that everything is peachy:
Recap
You’ve built an interactive Table View app using constraints, Table View delegates, custom Table View cells, and custom behavior. Great job!
If you have any feedback on this tutorial, found something particularly difficult to understand, or got stuck on a weird bug, you can reach out to us on our Facebook group.
https://www.facebook.com/groups/iosgatech/


