Note View Controller
In this part of the tutorial we’re going to modify the NoteViewController class to display a Note object.
Go ahead and open NoteViewController.swift.
First, add a note variable to our NoteViewController. NoteViewController will rely on other
@IBOutlet weak var bodyTextView: UITextView!

var note: Note?
Second, we’re going to create a method to display our Note’s properties in our UI elements.
override func viewDidLoad() {
    super.viewDidLoad()

    configureUI() // 1
}


private func configureUI() { // 2
    if let note = self.note { // 3
        self.title = note.title
        self.titleTextField.text = note.title
        self.bodyTextView.text = note.body
    } else {
        self.title = "New Note"
        self.titleTextField.text = "New Note"
        self.bodyTextView.text = nil
    }
}
Let’s break it down
- In the
viewDidLoad()method, we know that our IBOutlets have been initialized so we can access thetitleTextFieldandbodyTextView. - Our configure method is private because there is no reason to make this method publicly accessible. Always default to making methods and variables private unless you explicitly want them to be public.
- If we have a note then set the title and body to the information existing in the note. If no note exists, we’ll let user to create a new note. Leaving the UI blank usually isn’t helpful so go ahead and give the user a hint by setting the title to “New Note”
Passing Notes in Class
The goal for this portion of the tutorial will be detecting when one of the table view cells is tapped and passing the selected Note from the NoteListTableViewController to the NoteViewController.
When you tap on a cell now, it triggers a segue from the NoteListTableViewController. Open up NoteListTableViewController.swift and you should see a commented out method called prepare(for segue: UIStoryboardSegue). Uncomment that method (or if you deleted it just write it out as below).
The UIStoryboardSegue class contains a variable called destination which is a reference to the UIViewController being transitioned to (for us that is a NoteViewController). The sender argument is the object which triggered the segue; when a tapping on a cell triggers a segue the sender is the selected UITableViewCell.
override func prepare(for segue: UIStoryboardSegue, sender: Any?) {
    if let noteVC = segue.destination as? NoteViewController { // 1
        // Show existing note
        if let selectedCell = sender as? UITableViewCell,
            let selectedIndex = tableView.indexPath(for: selectedCell) { // 2
            noteVC.note = self.noteDatabase.note(atIndex: selectedIndex.row) // 3
        }
    }
}
Breakdown
- The cast to
NoteViewControlleris necessary because all segues are routed through this method and we need to distinguish between different segues. - Just having a UITableViewCell is not very helpful, we need to translate that to an IndexPath. Luckily UITableView has a method which does that for us.
- Finally we retrieve the selected Note from our Note Database and set the note variable on the NoteViewController.
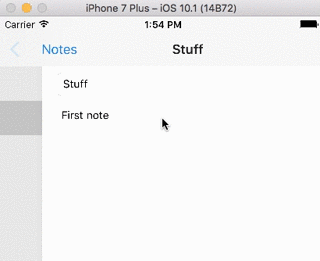
When you build and run the application, you should be able to select and view notes.
Recap
You added a Note variable to NoteViewController and displayed the note as soon as the screen loads. Afterwards you used prepare(for segue: ) to set the note variable when a cell was selected.


