Create our note database
In this part of the tutorial we’re going to create a database to store and order our notes.
Create a new Swift file called NoteDatabase. This class will handle all of our data storage and retrieval.
/// Stores notes with the most recently updated being dispayed first
class NoteDatabase { // 1
    private var notes: [Note] = [] // 2

    init() { // 3
        // Create some data to work with initially
        saveNew(note: Note(title: "First", body: "The first note", lastUpdated: Date()))
        saveNew(note: Note(title: "Second", body: "The second note", lastUpdated: Date()))
    }

    /// - Returns: The number of notes in the database
    var countNotes: Int {
        return notes.count
    }

    /// - Returns: The note at the given index
    func note(atIndex index: Int) -> Note {
        return notes[index]
    }

    /// Saves the note to the database, ordered by most recently updated
    func saveNew(note: Note) { // 5
        notes.append(note)
        synchronize()
    }

    private func synchronize() { // 6
    	notes.sort(by: { $0.lastUpdated > $1.lastUpdated })
    }
}
Let’s go through the code here
- The new class is going to be called
NoteDatabasebecause it stores all of our notes. - A standard Swift array of Note objects will be the backing data structure.
- For now lets put 2 notes into the our Database.
countNotesandnote(atIndex)are just wrappers around our backing Swift array.saveNew(note)adds the Note to our internal array then callssynchronize().synchronize()currently just sorts our backing array. Later on we’ll add persistence logic to write the notes to a file.
Implement Note List
Now it’s time to the UITableViewDataSource methods in NoteListTableViewController.swift to display a list of notes; go ahead and open that file.
First, we’re going to set the Table View’s datasource so that the Controller is reponsible for providing data for the Table View. The datasource only needs to be set once so we’ll do it in the viewDidLoad() method that we didn’t delete earlier. While we’re here go ahead and set the title to “Notes”.
// Do any additional setup after loading the view.
self.tableView.dataSource = self
self.title = "Notes"
Second, we’re going to create a NoteDatabase to use as our model. Go ahead and create this right under the tableView property.
@IBOutlet weak var tableView: UITableView!
private let noteDatabase = NoteDatabase()
Third, we’re going to implement the UITableViewDataSource methods using our note Database.
class NoteListTableViewController: UIViewController, UITableViewDataSource { // 1

    @IBOutlet weak var tableView: UITableView!
    private let noteDatabase = NoteDatabase()

	 override func viewDidLoad() {
        super.viewDidLoad()

        self.tableView.dataSource = self // 2
        self.title = "Notes"  // 3
    }

    // 4
    func tableView(_ tableView: UITableView, numberOfRowsInSection section: Int) -> Int {
    }
    func tableView(_ tableView: UITableView, cellForRowAt indexPath: IndexPath) -> UITableViewCell {
    }
- Tell the compiler that NoteListTableViewController implements the UITableViewDataSource protocol.
- Set the dataSource property on our tableview to the controller - this means the controller will be responsible for determining the number of rows creating cells for those rows.
- Set the title to “Notes”, since we’re already modifying the
viewDidLoad()method go ahead and make the center of the navigation bar display “Notes” - These two methods are required by UITableViewDataSource; we’re going to implement them in the next step.
Fourth, we’re going to implement the two required UITableViewDataSource methods.
For tableView(numberOfRowsInSection: Int) -> Int lets return the number of notes in our NoteDatabase.
For tableView(cellForRowAt: IndexPath) -> UITableViewCell retrieve the “NoteDetail” cell we created in the storyboard and use the Note object’s title and timestamp to set the textLabel and detailTextLabel respectively.
func tableView(_ tableView: UITableView, numberOfRowsInSection section: Int) -> Int {
    return self.noteDatabase.countNotes
}

func tableView(_ tableView: UITableView, cellForRowAt indexPath: IndexPath) -> UITableViewCell {
    let cell = tableView.dequeueReusableCell(withIdentifier: "Note Cell", for: indexPath)
    let note = self.noteDatabase.note(atIndex: indexPath.row)
    cell.textLabel?.text = note.title
    cell.detailTextLabel?.text = note.lastUpdated.description
    return cell
}
Recall that we set the UITableViewStyle to Right Detail. This means that UITableViewCell.textLabel is displayed on the left side and UITableViewCell.detailTextLabel is displayed on the right side of the cell. By using the built in style, we don’t need to subclass UITableViewCell, set our custom class in interface builder and then cast to the correct type in our code.
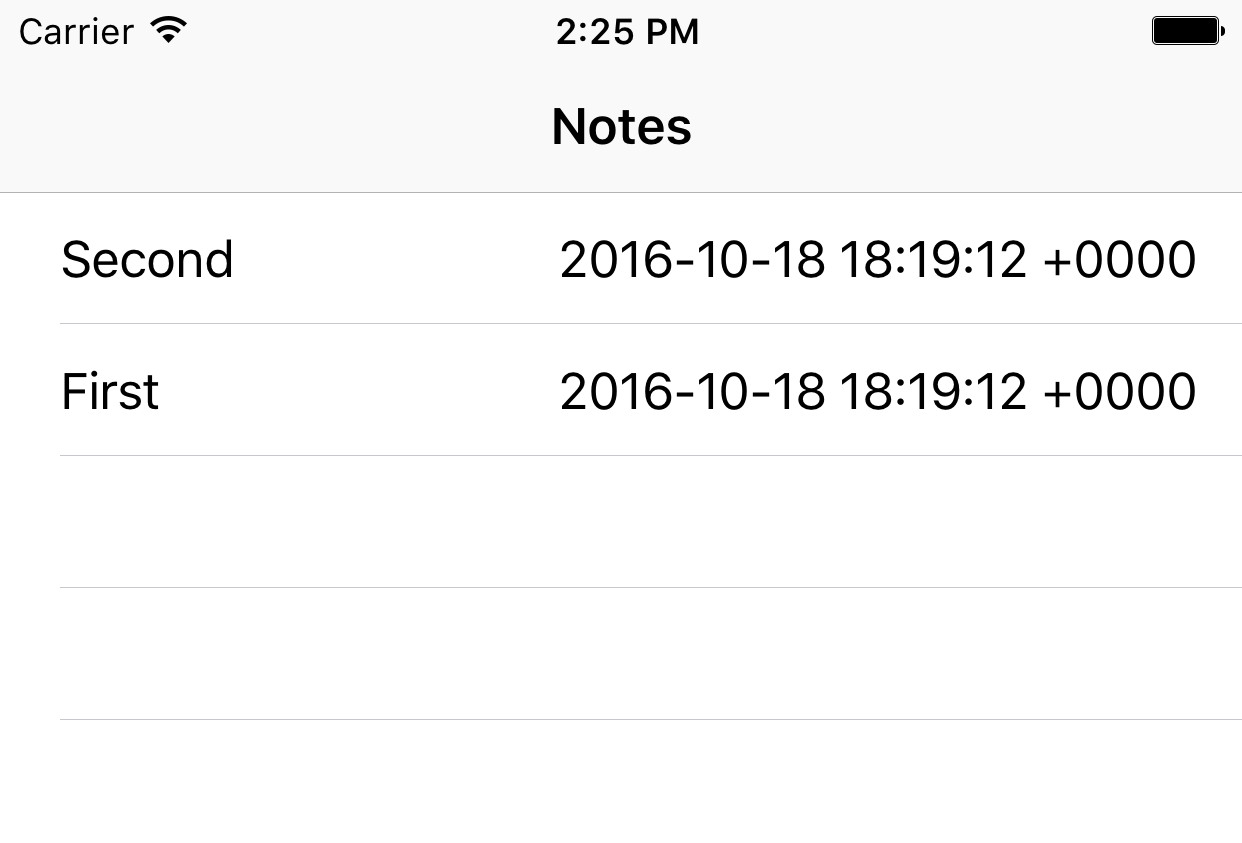
Build and run and you should see a list of notes that looks like the screenshot below.
Recap
We created NoteDatabase to store and retrieve notes then used it to implement UITableViewDataSource to display the title and timestamp of notes.


