CocoaPods is a dependency manager for Swift and Objective-C Cocoa projects. It has over 24,000 libraries and is used in over 1.2 million apps. You can learn more on the CocoaPods website.
Installing CocoaPods
If you have not already done so, you should go ahead and install CocoaPods. The process is very simple. First, open Terminal and run the command sudo gem install cocoapods.
Once it installs the CocoaPod gem, you want to run the command pod setup --verbose. This may take a while, but it’ll finish eventually. (If it gets stuck on Cloning into 'master'..., just give it some time. It could take up to 10 minutes.)
Configuring our Pods
For our Weather App, we will be using two third-party libraries: Alamofire and SwiftyJSON. We will be using Alamofire to handle networking in our app, and we will be using SwiftyJSON to parse the JSON data obtained from the Dark Sky Weather API. To install our pods, we need to initialize our Podfile.
Open up your terminal and navagate to the directory where you created your Xcode project. If you’re unfamiliar with the terminal, you can run the command ls to see where you are, cd <folder> to move in to a folder, and cd .. to move backwards.
Once you’re there, run the command pod init. This command will create a Podfile for your project. Once it’s been created, you can open it by typing open Podfile.
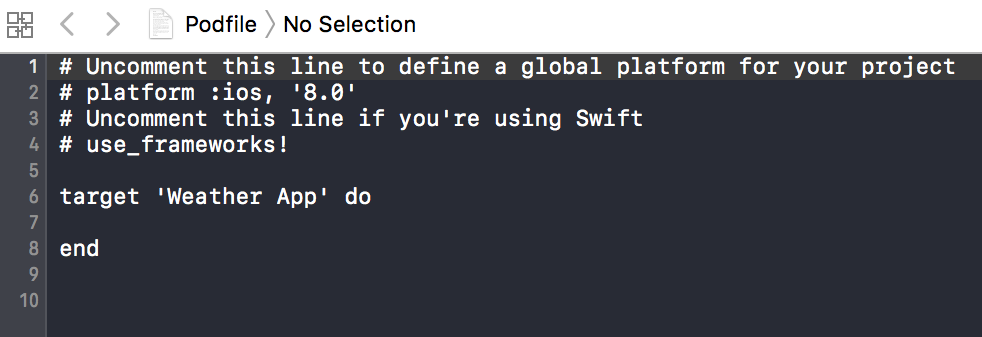
Your Podfile should look something like this:

Go ahead and uncomment the lines that say platform :ios, '8.0' and use_frameworks!. Also make sure to change iOS 8.0 to iOS 10.0, or whatever the most recent version is.
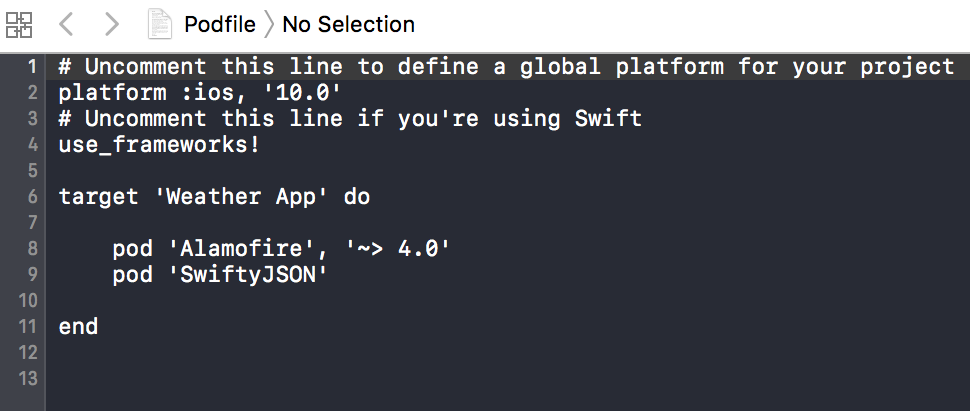
You add your specific pods between target 'Weather App' do and end. We’re using Alamofire 4.0 and SwiftyJSON, so add them in this format:
pod 'Alamofire', '~> 4.0'
pod 'SwiftyJSON'
Your completed Podfile should look like this:

Installing our Pods
Open the Terminal again. If you already closed it, make sure to navigate back to your project folder.
Once it’s up, you want to run the command pod install. This command will install the dependencies for your project. Once this process is done, we’ll be ready to start working on our app!
Next Time
Now that we have our pods set up, we will start creating the interface for our Weather App!


